In this blogpost, we want to draw your attention to one of the lesser-known features of Turnitin: it’s peer assessment functionality. Peer assessment helps students take greater ownership of their learning by encouraging reflection, shared responsibility, and active participation in a supportive learning community. It also develops valuable communication, collaboration, and feedback skills, while providing timely feedback that can improve academic performance and employability. This blogpost will show how you can use Turnitin’s PeerMark functionality to achieve some of these outcomes in your assessments.
- Create a Turnitin Assignment and enable PeerMark
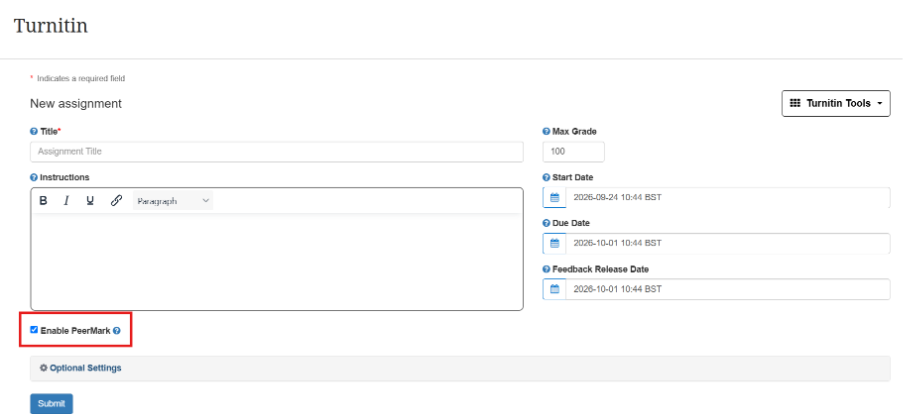
To create a Turnitin Assignment, follow the usual steps on Blackboard by clicking the purple plus sign to create context, then select ‘Additional Tools’ before choosing the option for Turnitin. When configuring the settings for the Turnitin Assignment, remember to tick the Enable PeerMark box before submitting.
- Go back into Turnitin Assignment to set up PeerMark Settings
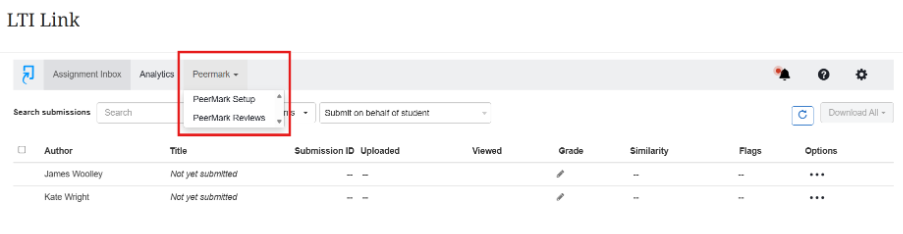
After the Turnitin Assignment has been set up, go back to this assignment on the Blackboard course page and click on the assignment to begin setting up the PeerMark settings. The settings for the PeerMark can be changed by clicking on the PeerMark Setup option under the PeerMark Tab.
After clicking on this option, you will be presented with three separate tabs relating to the PeerMark setup. More information about these tabs is noted below.
a. PeerMark Assignment Settings
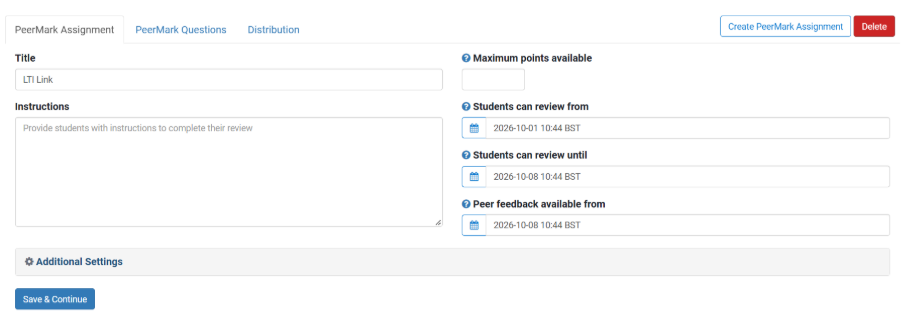
The PeerMark Assignment settings will allow you to select the start, end and feedback release date for the assignment. The maximum points available for the peer marking, the title given for the assignment and any further instructions for the students can also be entered here. This page looks very similar to the usual Turnitin setup. However, it is worth keeping in mind that these are the settings for Peer marking, rather than the overall assignment settings.
b. PeerMark Question Settings
The PeerMark questions tab allows instructors to support and guide the peer marking process through questions and scoring.
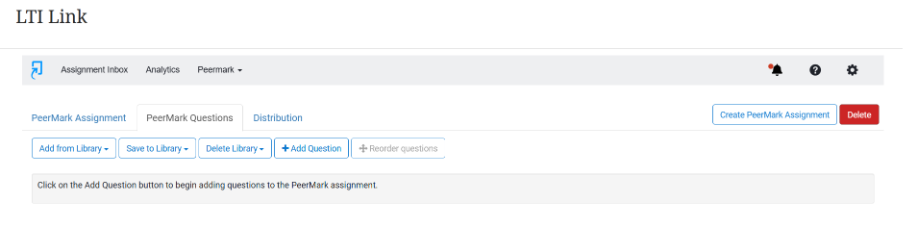
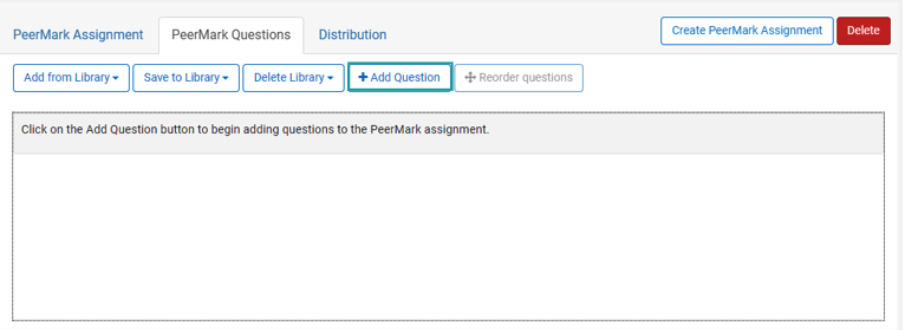
To manually add questions for peer marking, select and add questions to create a new question.
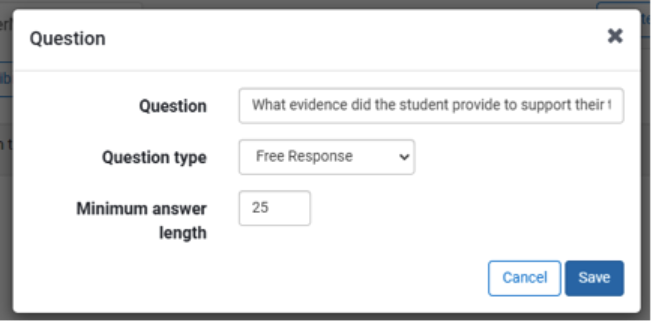
This then prompts you to type your question in the question field. After this, you will be prompted to select the question type from the drop-down menu.
There are two options available for question types. The first of these is a Free response. With a free response, students receive an open text field to record their responses. For this type of question, you must also provide a minimum answer length (in words).
The second type of question that can be selected is a scale response. Scale responses mean that students receive a sliding scale with which to rate the question. For this type of question, you must also provide a scale size and the names for the lowest and highest values.
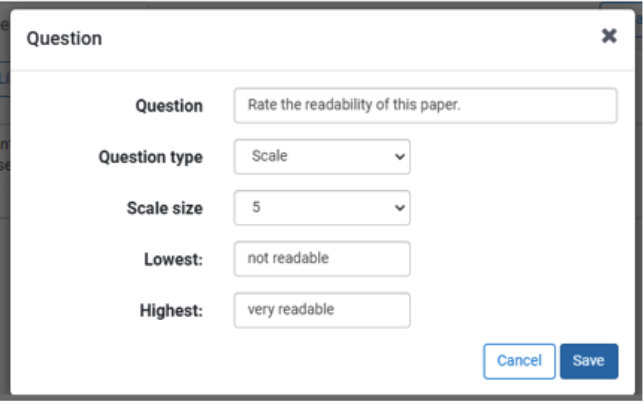
After you have created your questions, you can select Save to add the question to the PeerMark assignment. There is also the option to add these questions to the PeerMark library for future reuse. Once the PeerMark assignment has been submitted, it can no longer be edited. There are no late submissions allowed with PeerMark.
Editing, deleting, and reordering PeerMark questions
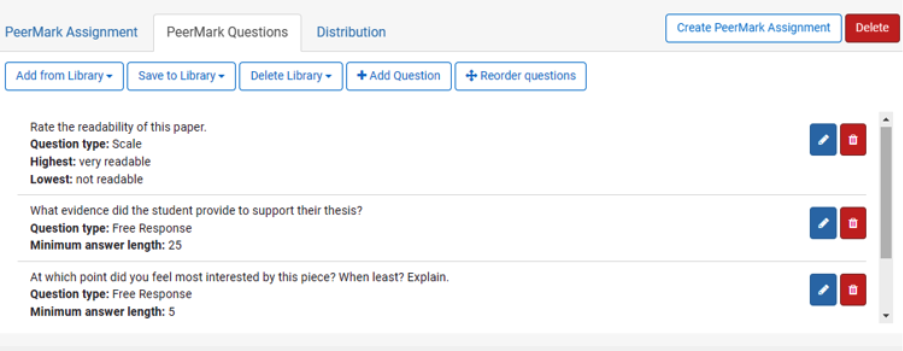
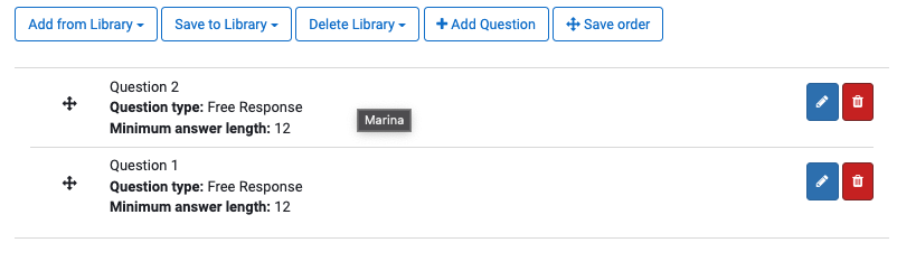
After you initially set up the PeerMark questions, there are options to edit, delete and reorder questions. To edit a question, select the blue pencil button in the same row. To delete a question, select the red rubbish can icon in the same row. To reorder a question, the first step is to select the reorder questions button from the top. Secondly, you have the option to select and drag to reorder PeerMark questions. Finally, click the save order button to save the new order.
c. Distribution Settings
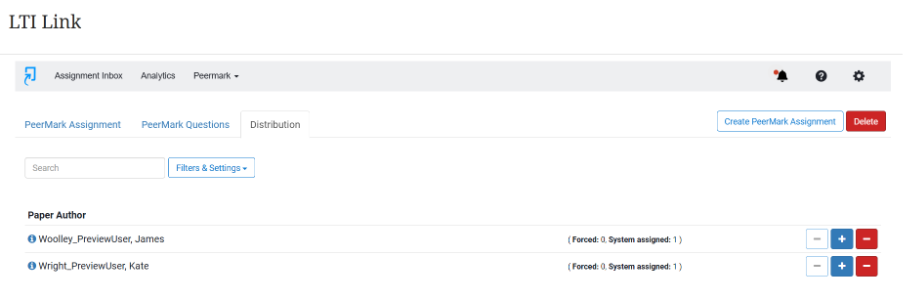
The distributions will allow you to see a list of students enrolled for the assignment. The blue ‘+’ sign and the white ‘-‘ sign will allow instructors to manually assign students to one another for peer marking. If this option is not chosen, Turnitin will automatically and randomly assign students to one another. The information to the right of the student’s names will allow you to see whether the students has been assigned a peer marking partner manually or automatically.
- Students submit to Turnitin submission point
Once the settings have been configured, students will be able to submit to the Turnitin submission point as usual. To do this, students should access the Turnitin submission point from the Blackboard course page. Like other assignments, the submission will then be submitted by selecting upload submission, then choosing a file for upload from your documents before submitting the assignment.
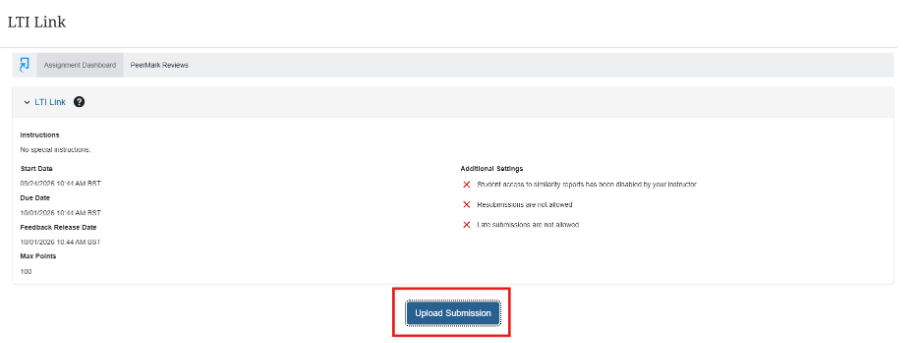
- After PeerMark start date, students are able to view another student’s assignment and leave feedback / scores to questions
Once work has been submitted and the PeerMark start date has passed, students will then be able to view another student’s assignment and leave feedback and scores to questions.
To do this, students should access the Turnitin submission point from the Blackboard page. When they open the submission point, there should be a PeerMark Reviews tab alongside the Assignment Dashboard. Click on that tab to begin the PeerMark review process.
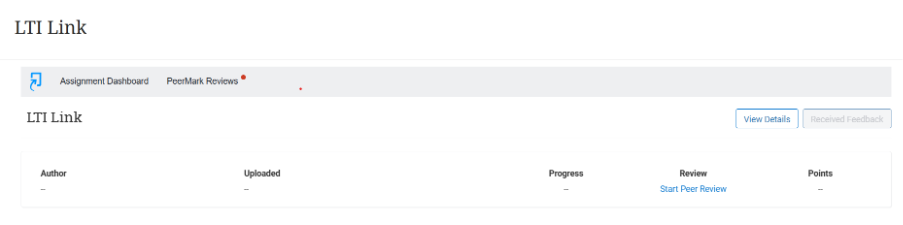
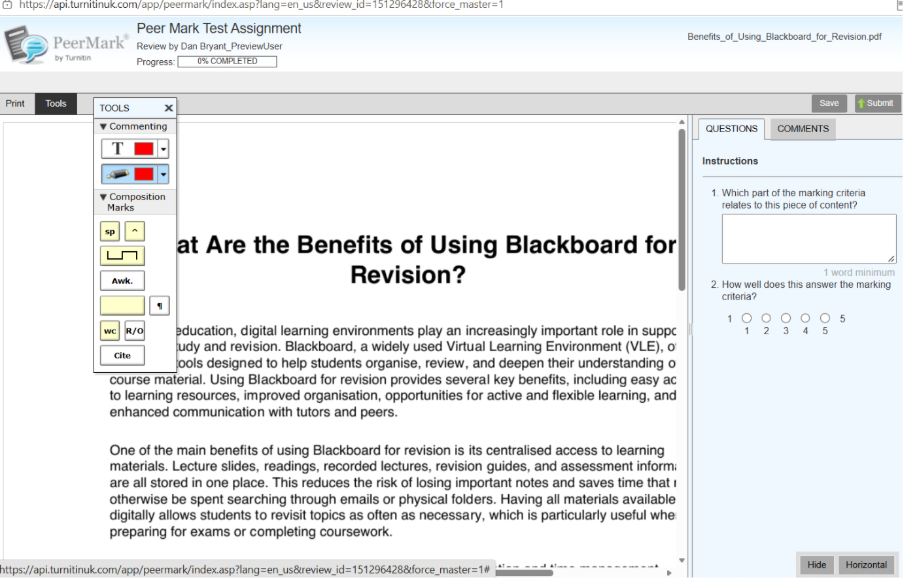
Clicking on Start Peer Review should open up the assignment that has been assigned to the student for reviewing. Once the assignment is open, you will be able to peer mark by providing answers to the preprepared questions set by the instructor and leaving comments on the page by double clicking on the text. Under the tools tab there are also more options to annotate on the assignment, by adding or highlighting text, for example.
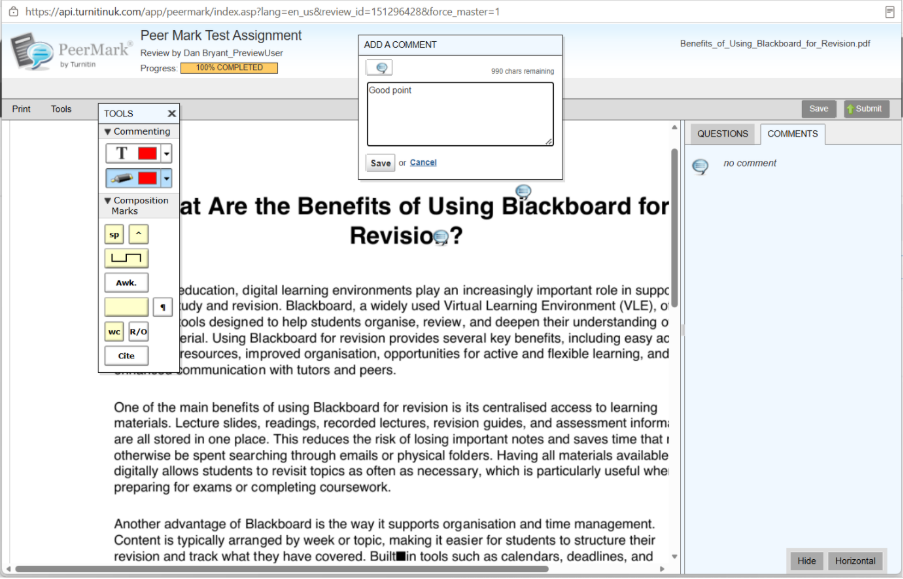
- PeerMark feedback is visible to students immediately
PeerMark feedback is visible to students as long as feedback has been submitted for them. To view the feedback, students should navigate back to the Turnitin submission point and click on PeerMark Reviews under the drop-down options of the PeerMark.
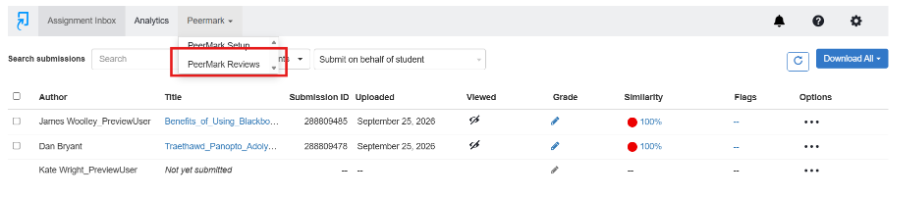
After clicking on this tab, you will be able to see the peer mark reviews by clicking on view received reviews.
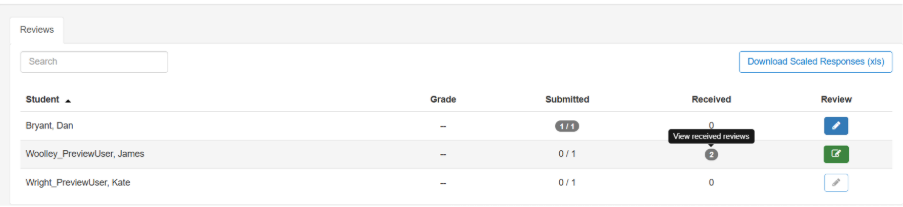
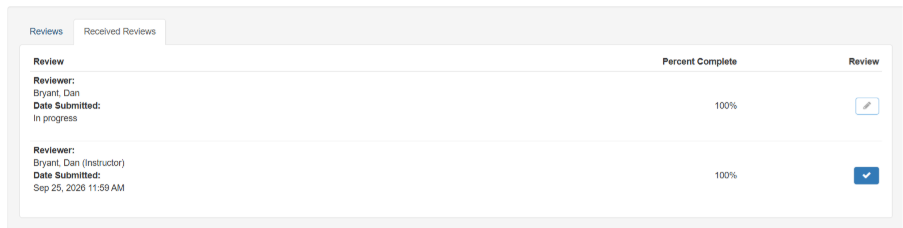
Clicking the review that you want to access from the list will reopen the assignment and should include the feedback from the peer reviewer.
- Lecturer needs to allocate a final mark manually
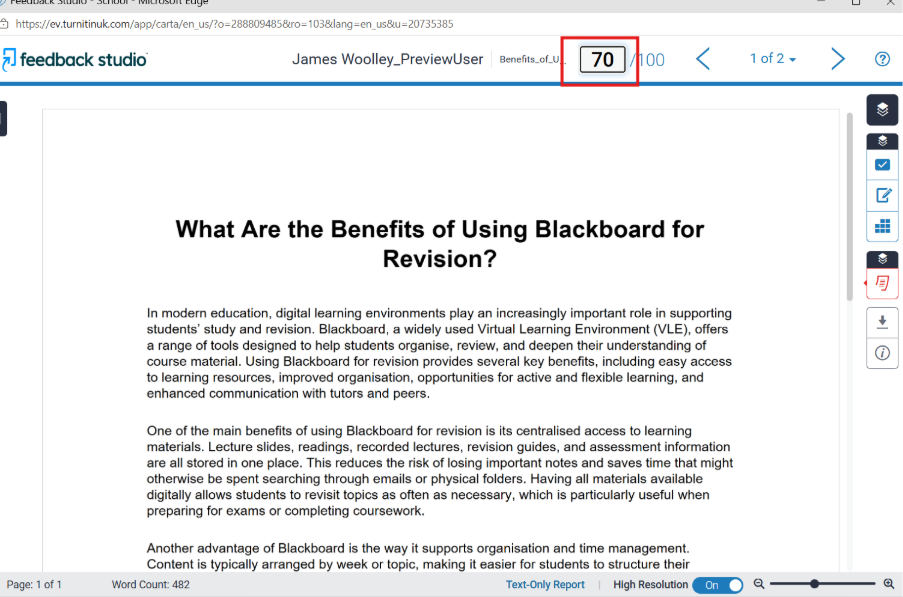
Taking into account the PeerMark feedback and scores to questions, the lecturer will then need to enter marks manually in each Turnitin Assignment. This will be done in the usual method by accessing the students’ submissions in the assignment inbox and adding a grade on the top of the Turnitin marking studio.

 If you’re anything like us, we have been a little bit obsessed with Line of Duty recently (no spoilers here) and understand how the misspelling of the word ‘definately’ can have potentially catastrophic consequences and we wouldn’t want anyone to be accused of being in league with OCGs.