In the October update, we want to draw your attention to a new feature with the Learning Object Repository. There is also an important and highly requested update to Fill in the Blank style question, and tagging questions in question banks to help colleagues with question organisation.
Updates to the Learning Object Repository
We were very excited about the launch of the Learning Object Repository. We have already made use of it for the Blackboard standardised template and for Generative AI statements.
This month’s update sees the ability for us to upload files to the Learning Object Repository which colleagues can then copy into their courses.
We can stipulate the availability of the content, so that it can be available or unavailable to students.
See our webpage on the Learning Object Repository for further information.
Updates to the Fill in the Blank Question for Students
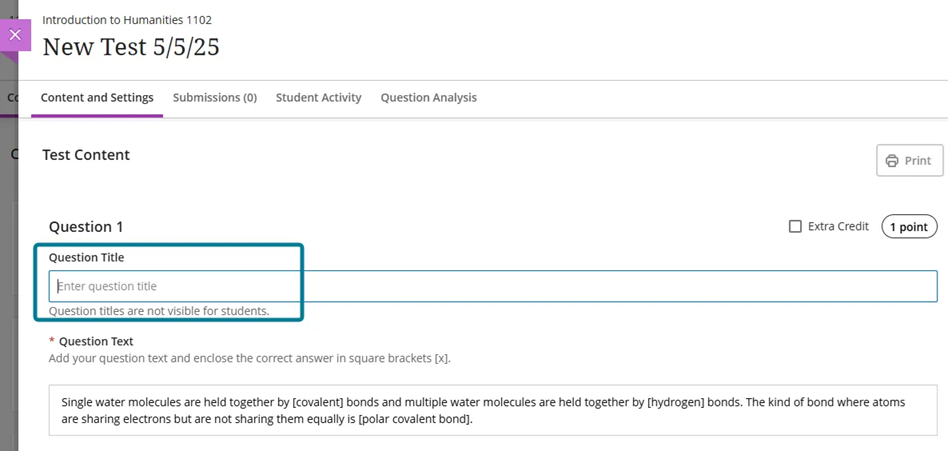
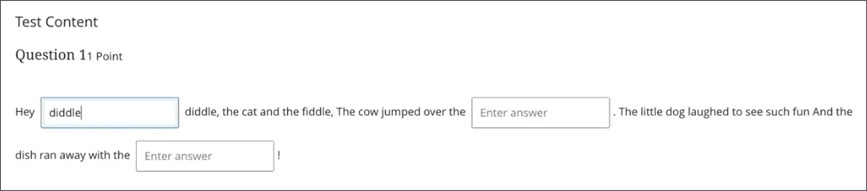
The way that Fill in the Blank Questions displays has been updated. This is an enhancement that colleagues have requested so we are pleased to this available.
Fill in the blank questions now display the blanks inline with the surrounding text, whether the question is presented as a sentence, paragraph, or table. We also added hidden ARIA labels to blanks to improve screen reader accessibility.
Image 1: Before this update, the blanks appeared below the question.
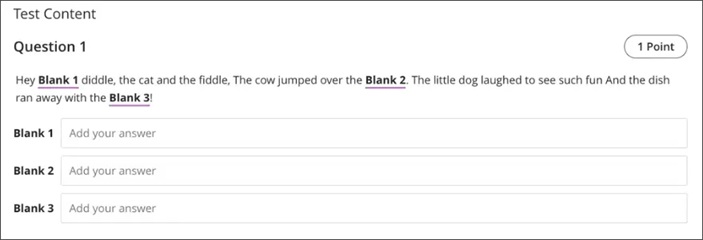
Image 2: After this update, the blanks appear in-line with the question.
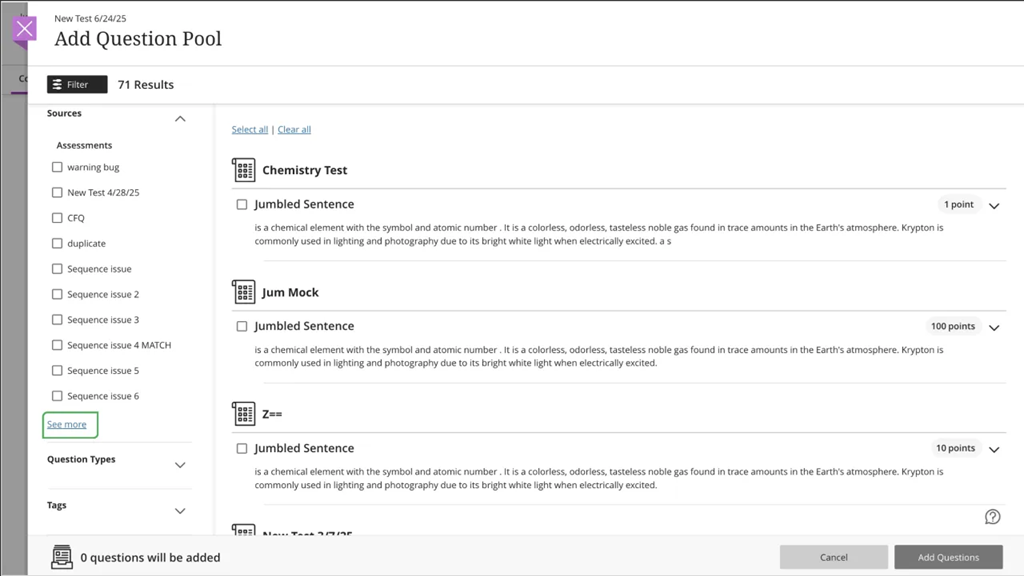
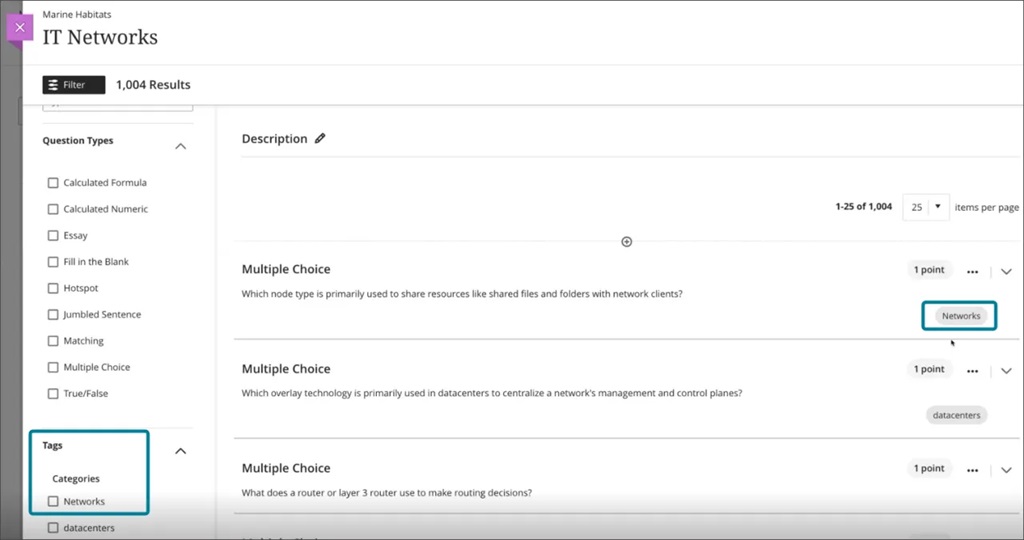
Tag questions with metadata in tests and question banks
Instructors can now tag questions with metadata when creating or editing questions in tests, forms, and banks.
Instructors
Questions can have multiple tags of the same type. Metadata is visible during question creation/editing and can be used to filter questions when reusing or adding to pools. Metadata is not visible to students during test-taking or review.
Supported metadata types include:
- Category
- Topics
- Levels of Difficulty
- Keywords
Image 1: Instructors can create and apply a tag to questions.
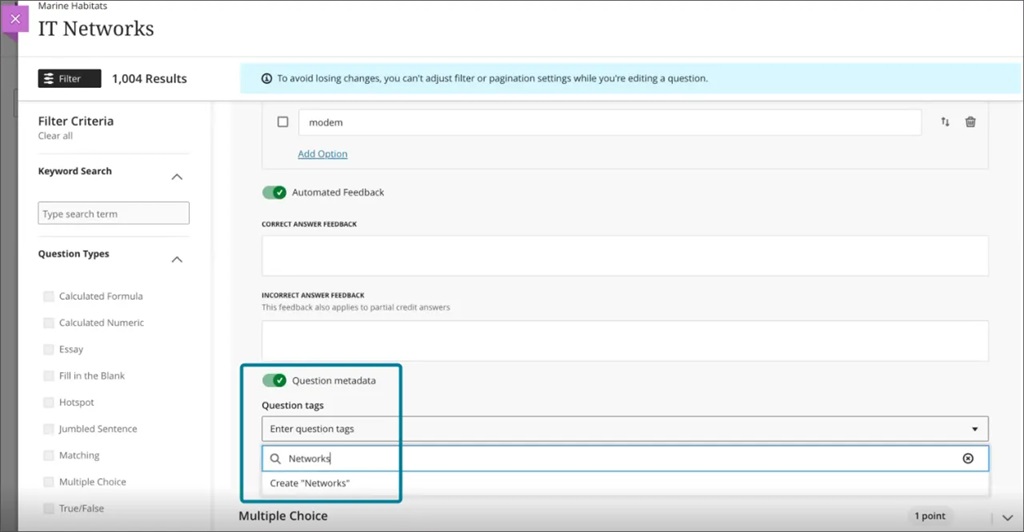
Image 2: Tags appear as filters in the question bank.
If you have any enhancements to request from Blackboard, please get in touch with us via elearning@aber.ac.uk.