In this blogpost we will be taking a look at one of the tools available to make your teaching in a Microsoft Teams session more interactive. The Whiteboard is a space where you and your students can collaborate.
The whiteboard can be used for:
- Students sharing ideas or thoughts
- Talking your students through a complicated diagram
- Mind-mapping ideas or concepts
- Sharing or charting a complex process
There’s a great video on using the Whiteboard in Teams by The Virtual Training Team: https://www.youtube.com/watch?v=qDqtWRu0rTA
When you’re in a meeting, you can share your Whiteboard:
- Click the Share icon:

2. Select Microsoft Whiteboard
3. Your whiteboard will then open and it will start presenting to your students. Your students are also able to contribute to the board: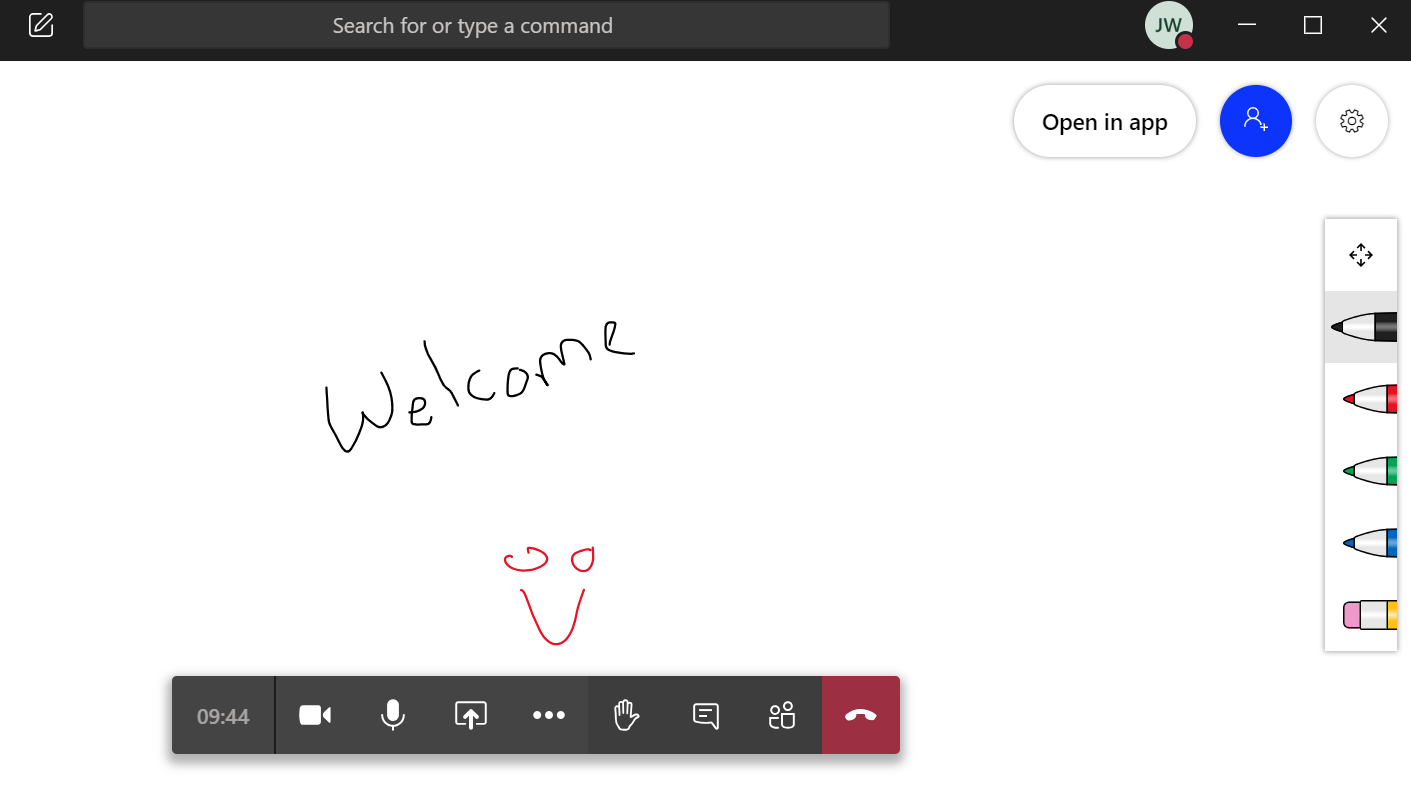
4. On the right hand side you’ve got several pens available and an eraser. This is the basic functionality in the MS Teams whiteboard. Here you and your students can choose to draw using your trackpad.
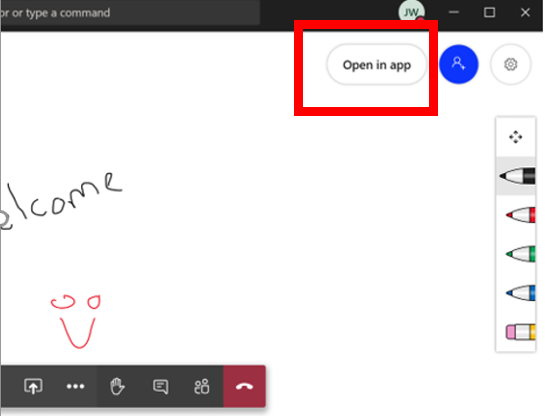
If you want additional functionality, download the app and when presenting your Whiteboard, select Open in app:
This will open Whiteboard in the app where you get much more functionality. There is an expanded menu item:
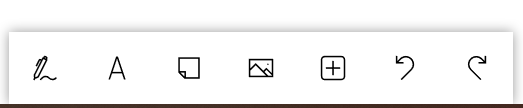
![]() This is a free hand pen. If you click on this you can choose many different pens that are available to you. In addition to pens and pencils, you’ve also got the functionality to add a ruler to your whiteboard.
This is a free hand pen. If you click on this you can choose many different pens that are available to you. In addition to pens and pencils, you’ve also got the functionality to add a ruler to your whiteboard.
![]() This is a text editor. If you click on this you can type text directly onto the whiteboard, without the need to draw freehand.
This is a text editor. If you click on this you can type text directly onto the whiteboard, without the need to draw freehand.
![]() This is a sticky note tool – you can ask your students to write their ideas on different sticky notes, or organise them into different thoughts.
This is a sticky note tool – you can ask your students to write their ideas on different sticky notes, or organise them into different thoughts.
![]() This icon allows you to upload image files onto the whiteboard. You may wish to annotate these.
This icon allows you to upload image files onto the whiteboard. You may wish to annotate these.
![]() Upload files into the whiteboard.
Upload files into the whiteboard.
Whilst these features are only available via the app, your students will still be able to see anything that you choose to present in the whiteboard.
If you want your students to be able to also make use of the full whiteboard functionality, such as adding photos and using the sticky notes feature, they will have to install the app as well.
Nice overview
Cheers Chris. Hope you’re keeping well! All the best, Jim.
Pingback: Good practice for Group Work online: 7 practical tips | Learning and Teaching Enhancement Unit
Pingback: Tips for teaching with Breakout Rooms | Learning and Teaching Enhancement Unit
Pingback: Arfer da ar gyfer gwaith grŵp ar-lein: 7 awgrym ymarferol | Learning and Teaching Enhancement Unit
Pingback: Make classroom teaching interactive with technology | Learning and Teaching Enhancement Unit
Pingback: Gwneud addysgu yn yr ystafell ddosbarth yn rhyngweithiol gyda thechnoleg | Uned Datblygu Dysgu ac Addysgu