Blackboard SaaS update 1

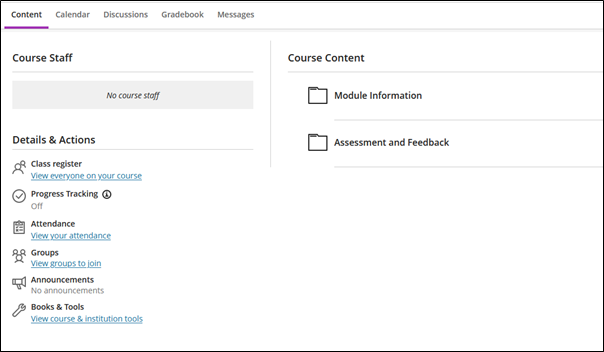
Blackboard LogoMany of you will have seen the announcement that AU is moving to the cloud-hosted, Blackboard SaaS platform. We plan to provide a monthly update on the progress of the project via the E-learning blog and this is our first update.

SaaS stands for Software as a Service, and there are advantages of moving to using Blackboard SaaS. The first, and most welcome one, is no more downtime once we have migrated to SaaS . Currently we have two planned maintenance periods every year – two days during the Christmas vacation and two days in the summer. Followers of this blog will know how difficult it is to plan these, and how it is virtually impossible to find a time that suits everyone. Blackboard SaaS is upgraded without any downtime (you can find out more about this and other SaaS features at https://uk.blackboard.com/learning-management-system/saas-deployment.html).

There will be a period of downtime as part of the migration process, but this will be communicated to you closer to the time. And the good news is that once we have moved, there will be no more Christmas or summer downtime announcements!

SaaS is upgraded using a ‘continuous deployment’ method – this means that every month Blackboard will be updated to the latest version. This update includes both bug fixes and new features. So, you should find problems get fixed earlier and you won’t have to wait too long for new tools or updates to current tools.

There is plenty of information about Blackboard SaaS online; if you do have a look, please note that there are two different versions of Blackboard available on SaaS, Original and Ultra. We’re planning to move to the Original version initially – and we’ll consider Ultra in the future.

Since we sent out the initial announcement, the E-learning Group and Systems Integration team have spent a lot of time getting to know SaaS. One of the most exciting things has been being given access to a completely fresh, new version of Blackboard. Most of us have never seen Blackboard without any courses or any users – it was a little bit like being faced with a patch of fresh snow!!

Our first priorities are to make sure that all the main features work as expected, and to check that all the add-ins (or Building Blocks) we use work correctly. We use Building Blocks for a whole host of things, from Turnitin and Panopto, to the scrolling banner on the homepage.

If you have any questions about Blackboard SaaS, you can contact us on elearning@aber.ac.uk


Online polling services and privacy issues

If you’ve already read part one of this series, you’ll know how useful online polling services are to engaging students actively in the classroom (if you haven’t – take a look).

As well as selecting a tool to suit your teaching and learning activity, you also need to take a look at the Privacy Policy of the service you’re interested in. This will help you to understand what:

  • personal data the company in question is collecting about you;
  • what personal data your students may be required to give;
  • information on how your presentations are stored;
  • how and where your data is kept.
https://flic.kr/p/8ouBhQ


Most companies make their Privacy Policy pretty easy to find (on most sites there was a link at the bottom of the homepage under the heading Privacy).

Here are our top tips when using an online polling tool:

  1. We found the Terms and Conditions of most services are fairly short and easy to understand – some even provided an ‘at a glance’ summary of main points.
  2. In the majority of cases, students are not required to create accounts or register for a service to take part in a polling activity. This means that for students, the only information that is collected about them would be details of the browser / device etc they used to access the poll. And this won’t be linked to their name or email address.
  3. In all cases, staff need to register with a service to create and display polls. For the majority of the services, you can either create a username and password, or link to an existing account (such as Google or Facebook).
    1. If you are creating your own account, don’t use your AU password as the password to the polling service. Follow our tips to create a strong, separate password (https://faqs.aber.ac.uk/index.php?id=25)
    2. If you are using an existing account, be aware of the data that may be shared between the two services. Your Facebook or Google account will contain lots of information about you that you may not want to be shared. You may want to look at the settings for the connection to make sure that you are happy with the level of data shared.
  4. Have a look at the rights you have to your polls. Some services allow other users to browse and share presentations, so you may want to consider the visibility of your presentations.
  5. Consider which third parties your data is shared with. We strongly recommend that you choose a service where the data is either based in the EU or where the company has the EU-US Privacy Shield standard in place. And check your preferences – do you want to opt-out of mailing lists, advertising etc.

At present, AU does not have a site licence for an online polling service, so when signing up for one of these services you are signing up as an individual, rather than as a representative of, or on behalf of, AU.


Choosing an online polling tool


Image of students using polling handsets
https://flic.kr/p/9wNtHp


In-class polling or voting is great way to increase student engagement and interactivity in the classroom (for example see: Shaw et al, 2015; Boyle and Nicol 2003; Habel and Stubbs, 2014; Stratling, 2015). It is used widely in both higher and further education, and number of staff at AU make use of in-class polling on a regular basis. In addition to physical Qwizdom handsets available in loan stock, staff are more and more using online polling services such as Poll Everywhere, Socrative and Mentimeter (amongst others). These services allow students to use their own devices (such as mobile phones, tablets and laptops) to take part in polls, give feedback, and ask questions.

The E-learning Group can provide a wide range of information and support for anyone interested in using polling in their teaching. This ranges from advice on how to embed polling into your teaching practice successfully, to practical help on creating and using polls in the classroom.

At present AU doesn’t offer a centrally supported online polling tool for mobile devices. However, there are a wide range of services available, many with free or trial versions. This blog post is designed to help you assess which tool suits you and your students’ best.

  1. What do you want to do? As with all learning technology implementation, the first question you need to ask is ‘what do I want my students to do?’ The service you select will depend on the answer you have. For example, if you want your students to submit questions, or provide written feedback, look for a service that offers more than multiple choice questions.
  2. How many students will be in the class? Many of the free or limited versions of paid-for software have a limit on the number of students they can be used it. Look carefully at the details of what the free version does or doesn’t include.
  3. We also strongly recommend that you look at the Privacy Policy of the service to ensure you know what personal data is collected about you and your students (have a look at our blog post on this issue).

The E-learning Group has produced some information on some services which you may want to look at.

Once you have decided on which service you are using, here’s some of our top tips on successfully using voting in the classroom

  1. Think about your question/s. There’s lots of resources on designing good questions, particularly multiple choice questions. Don’t feel that you have to ask a question that has a correct or incorrect answer. Sometimes a question that sparks debate or shows the breadth of opinions on a subject can be useful.
  2. Using polling as a discussion starter. There are a variety of ways that you can use polling and group discussions together – two popular ways are Peer Instruction (especially the work of Eric Mazur) or Class-Wide Instruction (Dufresne, 1996)
  3. Practice. Have a practice before the session so that you are comfortable and familiar with using the questions and displaying the results. You can do this from your office using a mobile device such as a tablet or mobile phone.
  4. Make time in the lecture. If you are using polling activities in the classroom, make sure you leave enough time to give students to access on their devices, think about the answers and respond. You may also need time to correct misunderstandings or explain the answers.
  5. Let your students know in advance. Make sure that your students know to bring their devices and have them available in class. You can do this using the announcement function in Blackboard. You can also provide links to relevant FAQs such as how to connect to the AU wifi (Android: https://faqs.aber.ac.uk/index.php?id=692, Windows: https://faqs.aber.ac.uk/index.php?id=870, iOS: https://faqs.aber.ac.uk/index.php?id=700 )

There are a whole range of opportunities for using polling – from collecting information on how much the students know at the start of a module, to finding out what topics you need to cover in a revision session. You can also collect opinions, gain feedback on how the lecture is going, or collect anonymous questions. If you’re using polling in your teaching get in touch and tell us more – we may even feature your work on the blog!


Blackboard Grade Centre

The Blackboard Grade Centre is probably the most powerful yet underused part of a Blackboard module. Every Blackboard module has one, but how often do you use it and are you getting the most out of it? I’m a big fan of the Blackboard Grade Centre so I’m using this series of blog posts to introduce to some of the hidden features which could make your marking and assessment life easier.

The first post is about setting up the Grade Centre. Like many things, a little bit of thought and planning before you start goes a long way. Some advance organisational work will make your life a lot easier in the long run.

So, what sort of things should you consider?

  1. Organise before you create. Some features like categories and Marking Periods are added to columns when you create them. It’s useful to set these up first, rather than go back and edit afterwards (although that it is possible).
    1. Categories. There are built in categories for types of tools (e.g. Tests, Assignments ) etc. which are applied automatically when you create them. But you can also create your own. For example, you might want a category for Exams or Presentations. You can also do calculations based on the category of a column using the Calculated Column options. Blackboard help on Categories.
    2. Marking Periods. These are time periods for when the work is marked. This would be useful if you are putting a lot of marks directly into the Grade Centre for a long-thin module. You could have a Semester 1 and Semester 2 grading period and then filter by these so you only see the relevant columns. Blackboard help on Marking Periods.
  2. Do you need any additional columns? Anything that you can grade in Blackboard generates a Grade Centre column when you create it. So, if you have a Turnitin Assignment, graded Discussion Board or Wiki, you have a column in the Grade Centre already. If you want to store marks for presentations, exams, in-class tests, oral exams etc., you can create your own columns. Blackboard help on creating columns.
  3. Think careful when you name your columns (either manually created columns, or the ones created when you set-up Turnitin etc.). They should be meaningful and easy to understand which assessment component they relate to. This is especially important when mapping components for marks transfer. A common problem is two e-submission points both called Essay; make sure you use titles which make sense such as Essay 1 and Essay 2 or Nutrition Essay and Exercise Essay.
  4. Do you want to make any calculations or combine marks? AStRA takes care of the weighting of your assignments in the overall module mark calculations, but you may want to group together small assignments to make calculations or show to the students. For example, you might have a set of weekly tests that make up one component of your module assessment. To do this you can create one of the calculated columns. Blackboard help on Calculated Columns.
  5. What do you want the students to see? Most people know that you can hide Grade Centre columns to the students, but did you know that there is a Primary and Secondary Grade. This means that you can show the students a letter grade, or even that the work has been marked, without showing the grade. This is a way of giving feedback before the releasing a mark.
  6. Viewing and filtering. There are a number of ways you can organise your Grade Centre to help you see only the things you want to see. Depending on how many columns you have and what you need to do, one of the following might be useful:
    1. Smart Views and Favourites. You know the Needs Marking and Assignments items under Full Grade Centre in your menu? These are shortcuts that take you to filtered views of the Grade Centre. Did you know you can add your own shortcuts here, using categories or groups of students as the criteria? Blackboard help on Smart Views.
    2. Filtering. Like Excel spreadsheets it is possible to filter your view of the Grade Centre, to only certain sets of information. Blackboard help of filtering.
  7. Colour coding. This is my personal favourite. You can colour code the Grade Centre to quickly show which students are getting very high marks, and which students might need a little more help. This is particularly useful for tests which are marked automatically and you may not see the results straightaway. It provides you with a quick visual way of seeing who might need some further help. Blackboard help on colour coding.

The next instalment of this series will be marking and dealing with grades. If you want any help with setting up your Grade Centre, get in touch and we can go through your requirements and get you up and running.


Blank Course Copy

Today (30/07/2018) the first two departments had their blank level 0 and 1 modules created as part of the blank course copy process. IBERS, closely followed by International Politics, have agreed their departmental templates and their modules are now ready to be updated. This is nearly a quarter of all the level 1 and level 0 modules running in 2018-19 academic year.

Staff from the E-learning Group have worked with each department to explain the process and help them decide which additional menu items to add to the core template. The modules are now available, and staff can start adding or copying over teaching materials. There’s an FAQ about how different items can be copied over.

2018-19 modules can be found on the 2018-19 Modules tab which is now available on the My Modules page.

Blank Course Copy infographic

A big thanks to Mike Rose and James Vaughan who have worked with the E-learning Group through this process. If you’re a member of staff in either International Politics or IBERS and you want any help setting up your new module, take a look at the FAQ, or contact elearning@aber.ac.uk and we’d be happy to help you.

If you’re not sure what Blank Course Copy means, have a look at our infographic or email elearning@aber.ac.uk