
In this blogpost we’ll be taking a specific look at the Gradebook feature in Blackboard Learn Ultra. The Gradebook is the new name for Grade Centre.
It is used to hold all student marks on a Blackboard Course.
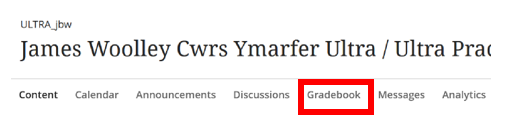
The Gradebook is located on every course from the top menu.
Students enrolled on the module automatically appear in the Gradebook.
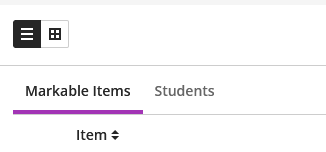
When you get into the gradebook, you can toggle your view.
Default is a list of markable items on one tab and students on another:
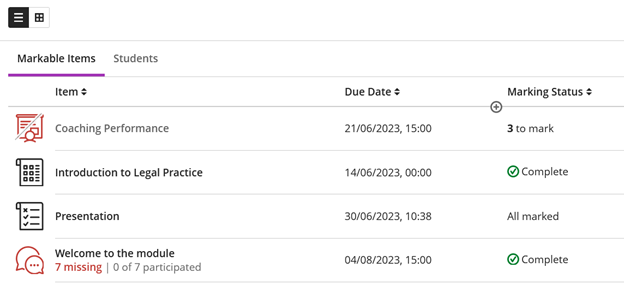
You can toggle your view so that you can see the markable items and the students in one view.
![Grid view of Gradebook]](https://wordpress.aber.ac.uk/e-learning/files/2023/09/image-19.png)
Automatically created columns
As with Blackboard Original, some columns are automatically created in the Gradebook:
- Turnitin Assignments
- Blackboard Assignments
- Blackboard Tests
- Graded Discussions
- Graded Journals
You don’t need to do anything with these.
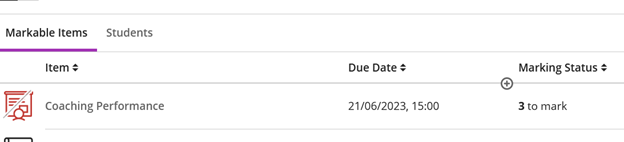
For outstanding items that have been submitted and are waiting to be marked, you can view the Marking Status:
Total column and Overall Mark
Unlike Blackboard Original, a Total Column is not created by default in Blackboard Learn Ultra.
You can, however, set up an overall mark if you wish but this is done manually.
The overall mark is a calculated item displaying as a running tally across all the graded items on a course.
The overall mark, if set up, is visible to students to track their progress.
To set up an overall mark, select the settings cog in the Gradebook:

Select Set up Overall Mark.
You can use Points, created a Weighted column, or use an Advanced formula to create a bespoke calculation for the overall mark.
Manually created columns
As before, you still have the ability to create columns manually. These columns can be used to record marks and feedback for assignments not submitted electronically.
These might be:
- Panopto video submissions
- Presentations
- Seminar contribution
- Art works
- Performances
To create a column, go to the Gradebook and the location that you want the column added to.

Select Add item and give your column a name.
You can choose whether it’s available to your students.
Calculated columns
Calculated columns can still be used in the Gradebook. Follow the steps above for Creating a Column and instead of selecting add item, select Add Calculation.
Here you can create calculated columns based on totals, averages, minimums, maximums, and variables.
Calculated columns
Calculated columns can still be used in the Gradebook. Follow the steps above for Creating a Column and instead of selecting add item, select Add Calculation.
Here you can create calculated columns based on totals, averages, minimums, maximums, and variables.
Posting Grades
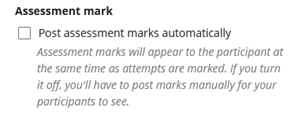
Ultra gives you the flexibility to release marks to students when you are ready for students to see them. This is called Post Grades and is available for Blackboard Assignments and tests. Marks release from Turnitin is controlled by ‘Post Date’ option in the Turnitin settings.
You need to think about when you want grades to be posted when you set up your assignment or test. Posting grades is controlled by Post assessment marks automatically option in the Assignment or test settings screen. We recommend that you untick this box for any summative assessment marks.
When you are ready to release the marks
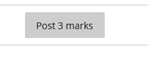
To Post all available marks in one go:
- Go into the Grade book and make sure you are in Markable Items View
Click the Post Marks button in the Post column
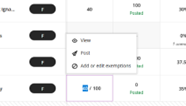
You can also post individual marks – you will need to do this for any late submissions that are marked after the marks have been posted to other students
- Go to the Grade book and make sure you are in Grid View
![Screenshot of Grid View]](https://wordpress.aber.ac.uk/e-learning/files/2023/09/image-26.png)
2. Click in the cell for the mark you wish to post and click on the Post button
3. This will make the mark available, and you’ll see Posted appear in green under the mark
![Screenshot of posted mark]](https://wordpress.aber.ac.uk/e-learning/files/2023/09/image-28.png)
Hiding and Showing columns
You can hide columns from students if required. These instructions work for any column apart from the overall mark
- Make sure you are in Grid View
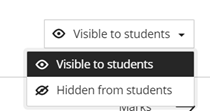
- Click on the name of the column and choose Edit
- Use the Visible to Students dropdown in the top right-hand of the screen to control whether students can see marks. For some items, you can use the Release Conditions to control when marks appear.
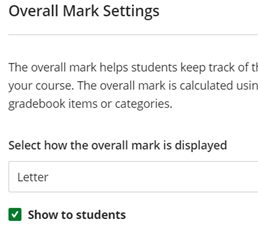
For the overall mark column:
- Make sure you are in Grid View
- Click on the Overall Mark icon and choose Edit
- Use the Show to students tick box to control whether students can see the overall mark.
See Blackboard’s Help for further information on Grade Columns.
If you’ve got any questions about using the Gradebook, then contact elearning@aber.ac.uk.