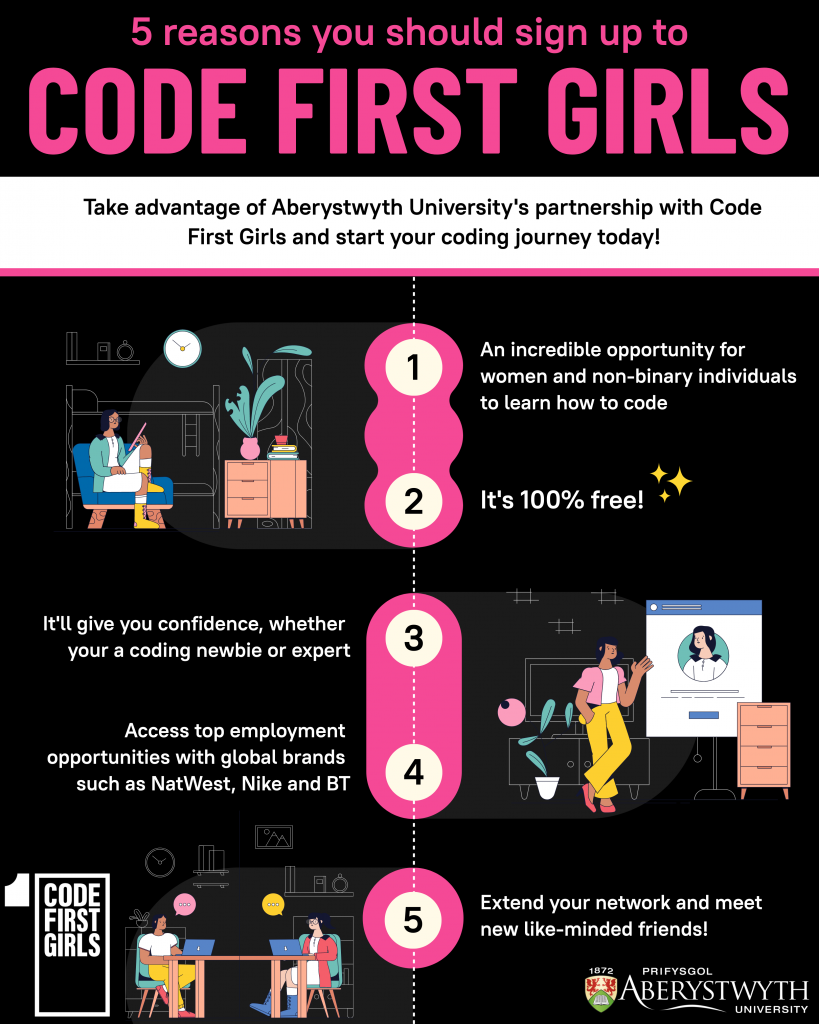
Have you ever wanted to learn how to code? Well now you can do so, for free, by taking full advantage of our partnership with Code First Girls! We’ve listed 5 reasons below why you should make the most of this wonderful opportunity.
Whether you want to schedule weekly catch-ups with colleagues, bi-weekly project meetings, or monthly team meetings, knowing how to set these up using the recurring meetings function in Microsoft Outlook will save you a lot of time!
The below video demonstrates how to set up recurring meetings in the desktop app version of Outlook, but the process for setting these up on MS Teams or the web version of Outlook is very similar.
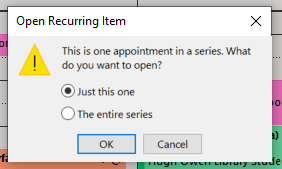
Once set up, your reoccurring meeting will now appear as a series in your calendar, and if you need to alter any details, you’ll always have the option of altering just a single occurrence or the whole series.
Blogpost by Joel Williams (Student Digital Champion)
For many students, balancing studying for exams, completing coursework, and actively searching for employment opportunities can seem insurmountable. I have found it challenging to stay on top of my studies while trying to find relevant jobs and then completing page after page of applications. Enter platforms like Gradcracker and AberCareers. First introduced to me during the Digital Skills Festival, Gradcracker, like many similar sites, amalgamated many employment opportunities explicitly tailored to my skills. In this blog post, I hope to outline some of the approaches I used to help manage my studies whilst job hunting and signposting several resources available via the University.
Managing your time ⏰
One of the foremost challenges job-hunting students face is time management. With lectures, seminars, and assignments demanding their attention, carving out dedicated time for job applications can be challenging. Truthfully, I found the time required by each job application to be an excellent way to procrastinate on my dissertation, which helped me complete it quickly. However, as my third year continued and other assignments started to loom, I found the best way to stay on top of it all was to give myself an hour or two each week when I would only focus on job application. To meet my self-imposed time limit, I save the URL of any roles I’m interested in and if they are on Gradcracker, I make sure to shortlist them, making them easy to find and highlighting how long I have to apply for the role.
So Much Writing ✍
Another hurdle students encounter is the pressure to stand out in a highly competitive job market. Crafting a compelling CV, writing tailored cover letters, and preparing for interviews are all essential components of the job application process. However, balancing academic achievements and relevant work experience can take time and effort, especially for those juggling multiple commitments simultaneously. The most helpful resource I found when trying to update my CV was to use the daily drop-in sessions offered by the careers service. I found having another pair of eyes check over everything invaluable.
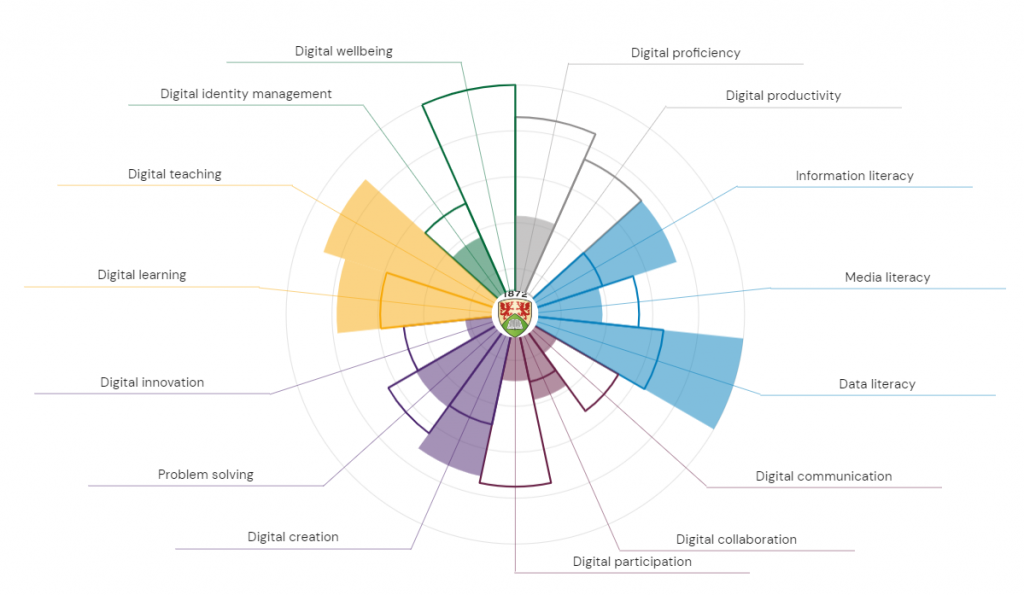
One of the sections of my CV I have always struggled to complete has always been the skills section. This is partially because it can be hard to know what is the most important to list and also because it can often be challenging to come up with a list of skills on the spot. To help complete these sections, I used a combination of module information and the Jisc Digital Discovery Tool, which I used to identify my digital proficiencies.
Example of a Jisc Digital Discovery Tool report
Polishing your Digital Presence 👣
One of the first steps I took early in the job application process was updating and polishing my LinkedIn profile. Spurred on by a session on How to use LinkedIn during the Digital Skills Festival, I revised much of my pre-existing profile and created something that I am now able to use for job applications.
Checking your digital footprint is an often overlooked element of applying for jobs in a digital age. My fellow Digital Champion Noel has written a handy blogpostexploring the steps you can take to protect your digital footprint and ensure that the public and employers can only see what you want them to. The Digital Skills Team have also curated a LinkedIn Learning collection on managing your digital identity.
Career Service 💬
If you’re looking for more specific advice, the careers service is the best people to speak to and details of how best to use this service, which is open to current students and post-graduates, can be found on their webpage.
Blogpost by Shân Saunders (Digital Capabilities and Skills Development Coordinator)
Working from home for most people has now become the new normal with home offices now a staple of most households. Being able to work from home is a positive in many ways but it can also allow us to be too consumed by our screens as well as having to adapt to new ways of working. As today is global work from home day, we want to share our tips and tricks for being more successful with working from home.
Step away from the desk!
As with working in any office, having regular breaks and stepping away from your computer is essential. This could be taking a break to make a drink, taking the time to stretch or even doing some desk yoga! You can view the below LinkedIn Learning courses and videos for some tips on taking breaks and stretching courses.
Digital ergonomics is important both to help your productivity with feeling comfortable and happy with your space but it’s necessary for maintaining your physical health too! You can improve your digital ergonomics through making sure your at home office space is set up correctly, be aware of eye strain and making the needed adjustments where you can. You can learn more about digital ergonomics through the resources below:
Working from home is a great benefit, but it can be very easy to be consumed by work and lose your day which is why it is so important to establish a routine. This can include maintaining a consistent lunch break, having specific focus times on certain days and if you have recurring tasks, completing these on the same days. View the below videos and courses for tips on establishing a routine.
Meeting virtually is now a requirement for anyone working remotely and with this has come about a new form of etiquette. It’s important to maintain professionalism while working from your home office. This can be having a virtual background, ensuring you have a headset of some form, joining the meetings early and being aware of whether your microphone or camera is on. You can learn more about best practice for online meetings with the resources below.
Although there are so many advantages and benefits to working from home, it can be isolating and difficult to maintain communication with fellow peers and so it’s highly important to stay connected. The best way to do this is to utilise online communication tools. This can be using Microsoft Teams or collaborative documents like Word online or SharePoint. You can learn more about the different types of method to stay connected below.
Blogpost by Shân Saunders (Digital Capabilities and Skills Development Coordinator)
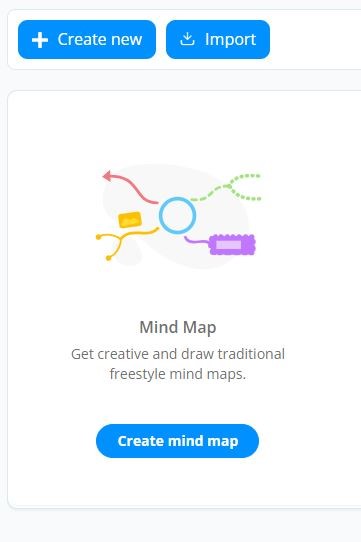
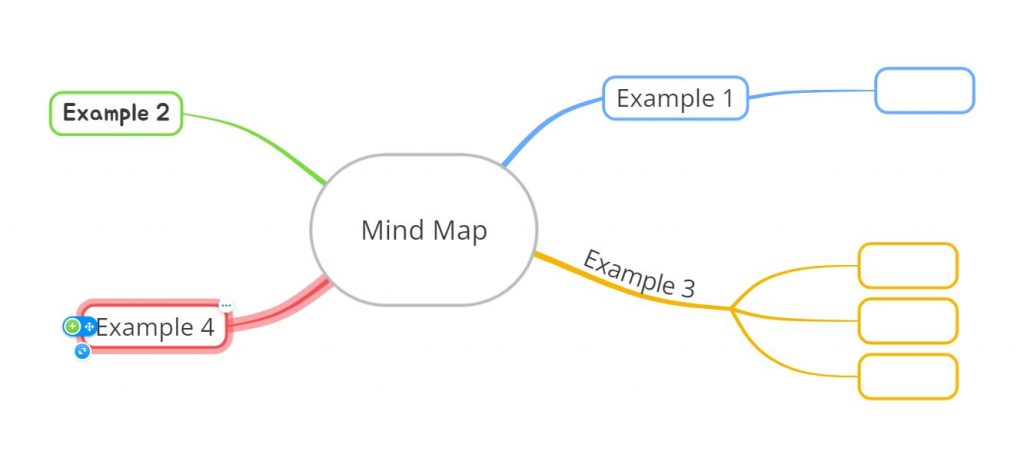
As a visual learner, I work best when I can lay all my ideas out in one place. I used to do this through pen and paper but now, with Ayoa I can do this online! Available both online and as a phone app, Ayoa allows you to create mind maps for free. It is a multilingual service, available in both English and Welsh where you can create as many mind maps as you want to help with multiple different projects or even if there is one plan that you want to split up further.
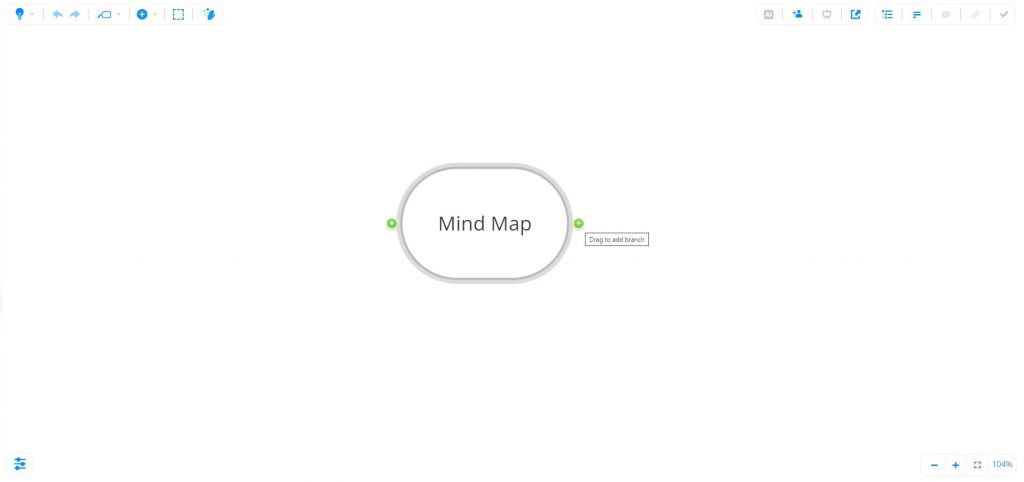
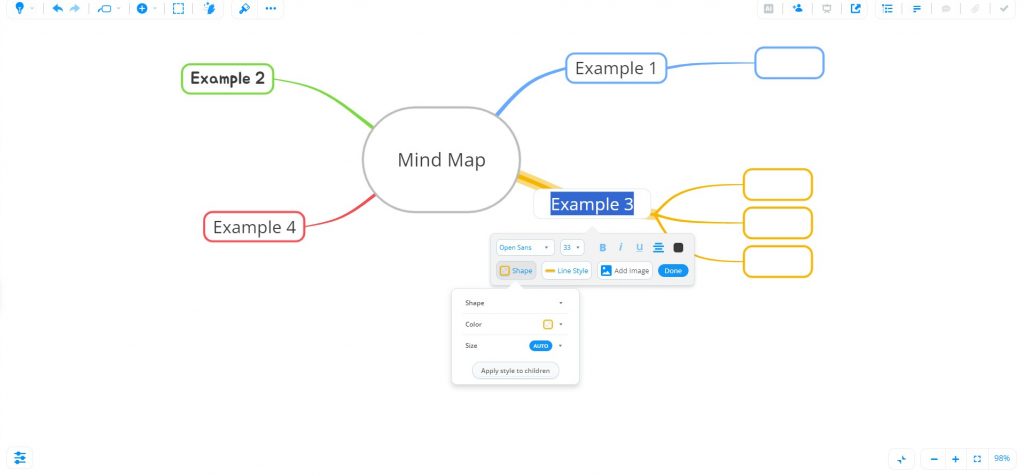
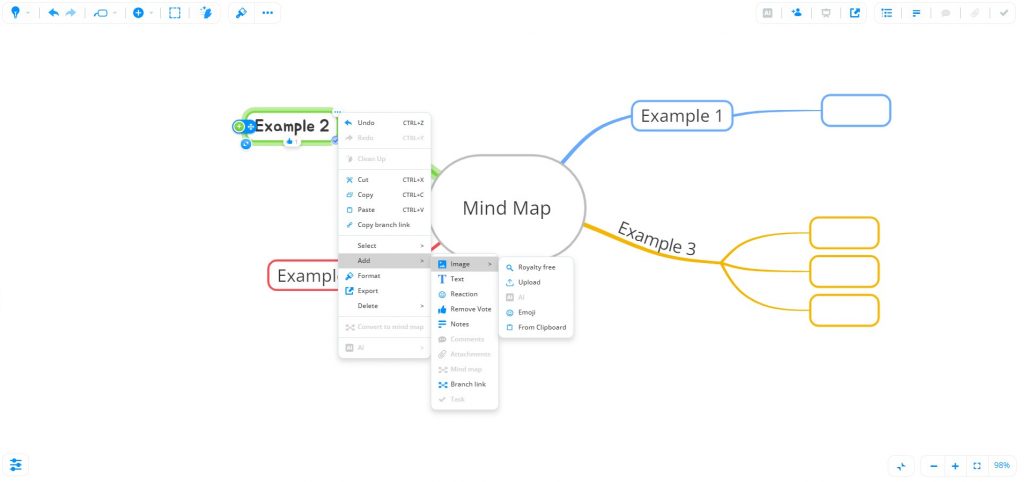
Features provided within the app include the ability to begin a mind map from scratch or select from one of the pre-created templates. Within this you have full power over customisable features for example, you can add unlimited branches from your centre title and colour code these according to your project and what makes sense to you! You can also fully edit font and text size as well as the sizes and shapes of each box and change the colour of each branch. If you even decide that a series of ideas and branches need to be a different colour you can change these through the “children” function which will subsequently change all formatting along this branch.
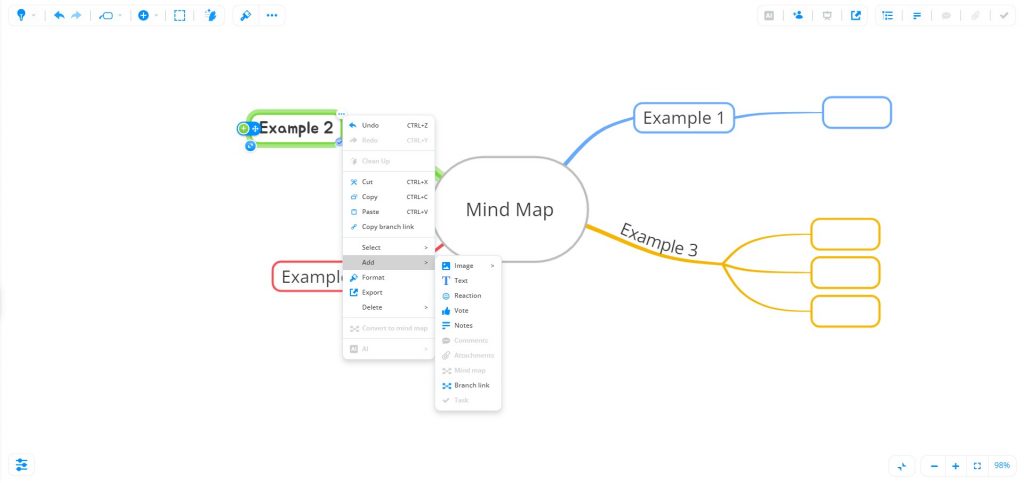
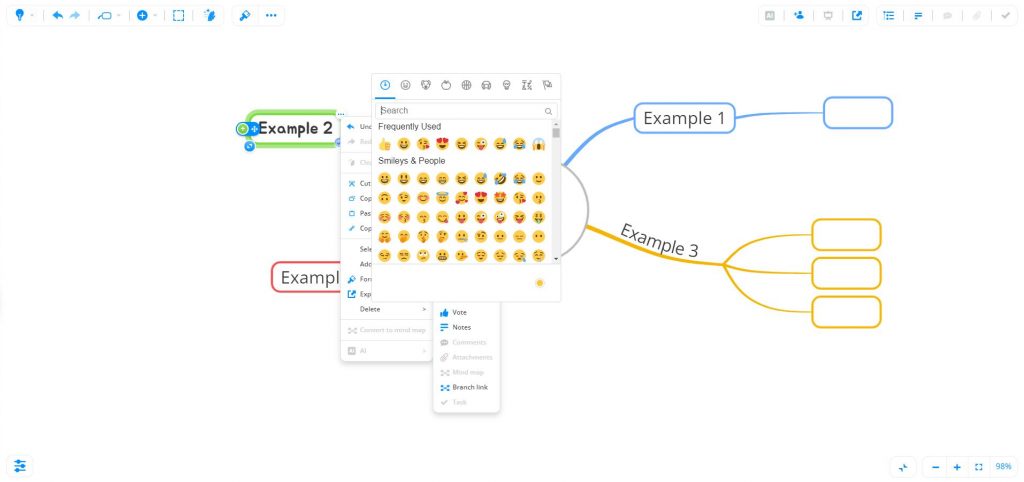
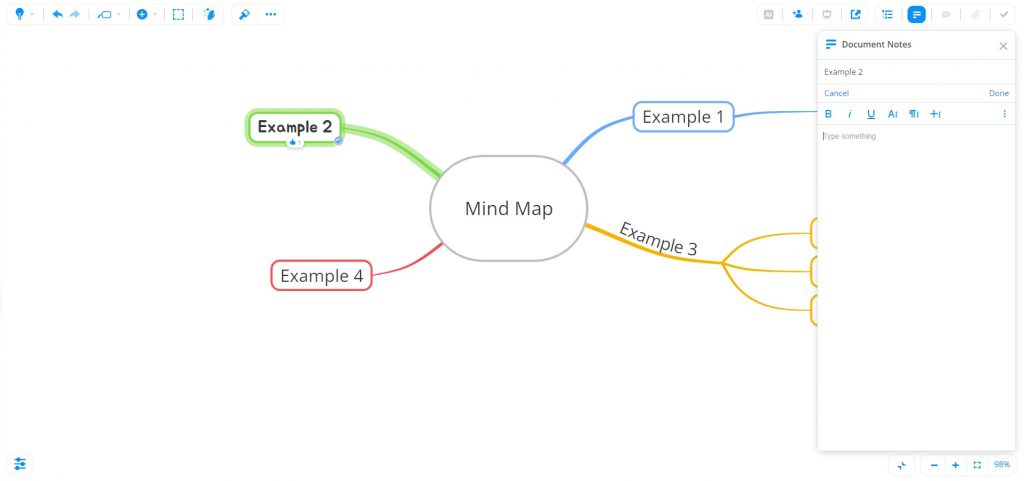
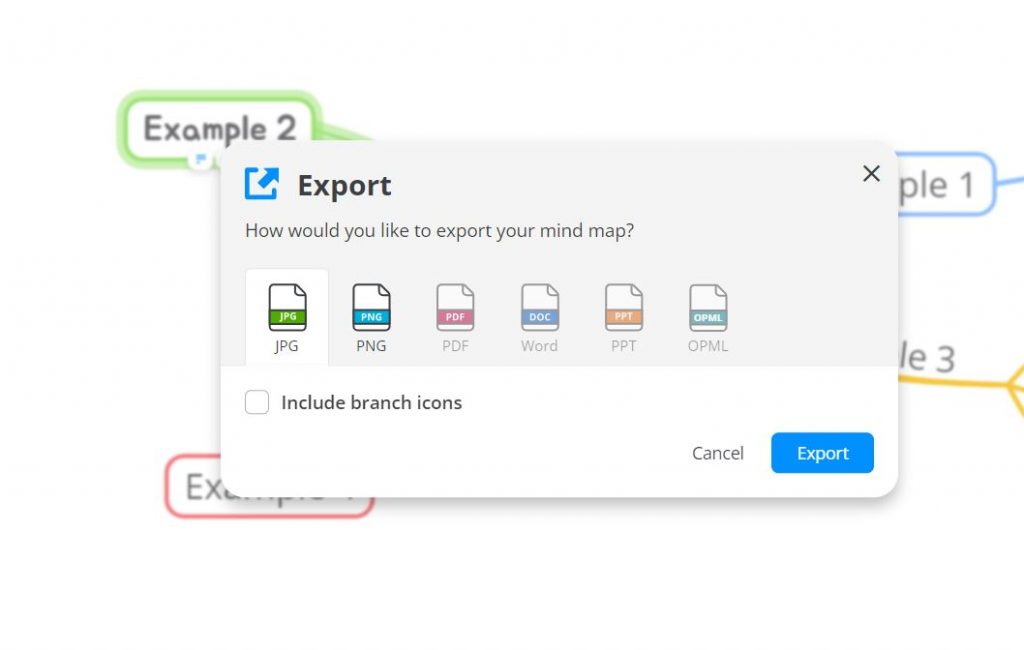
There are also additional features such as being able to insert emoji reactions to each branch and being able to insert or upload images that may help spark further ideas or reinforce points. You can add notes to certain points to add more information. If you want to share your mind map with others, you can export it as a JPEG and PNG and each mind map that you create will be saved to your Ayoa homepage.
These functions are all available on the free version of Ayoa which is permanently free. There is also a paid version of Ayoa (Ayoa unlimited) which has additional features such as the ability to collaborate live on a mind map as well as share mind maps with others in the app itself. You also gain access to different types of boards including whiteboards and task boards.
Blogpost by Shân Saunders (Digital Capabilities and Skills Development Coordinator)
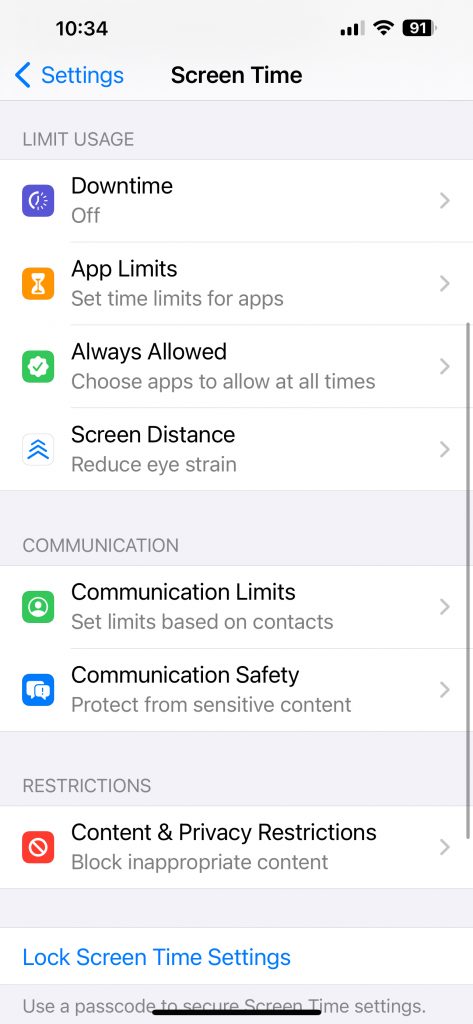
Whether you’re trying to work and keep getting distracted or sat on your phone before bed and can’t seem to put it down, using the screen time function available on iPhones may be beneficial to you. Accessed through settings and then screen time, there are multiple features to help manage your usage of apps as well as limit communications.
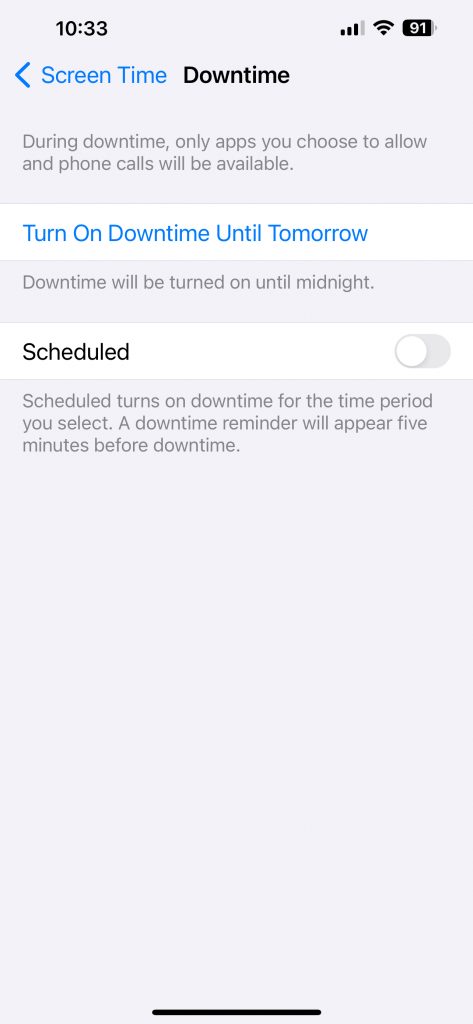
Downtime
When activated, if your phone is in downtime this means that only apps that you have chosen to allow and phone calls will be available. You can turn on downtime at any time or you can schedule it to automatically occur on certain days at certain times.
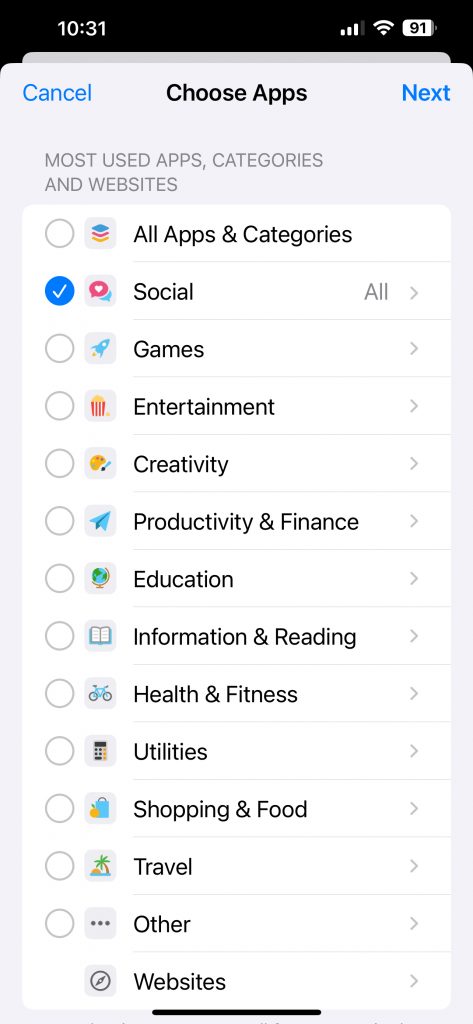
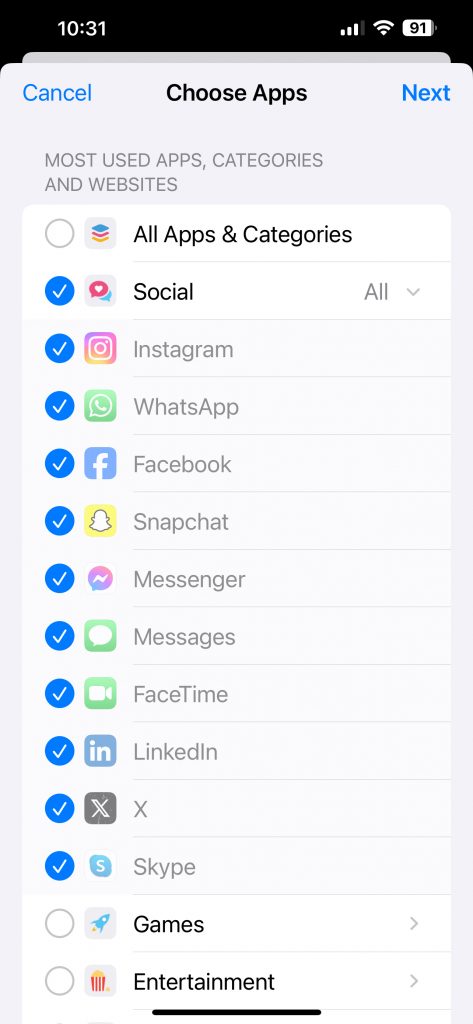
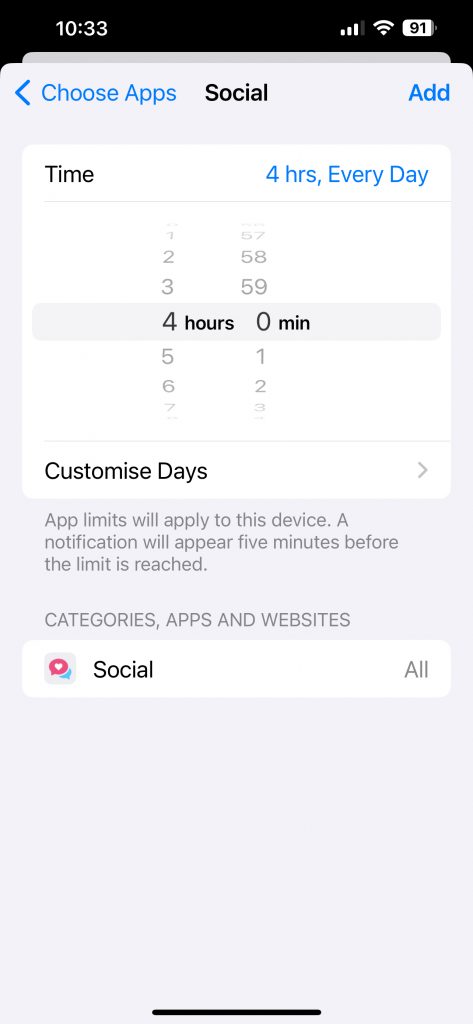
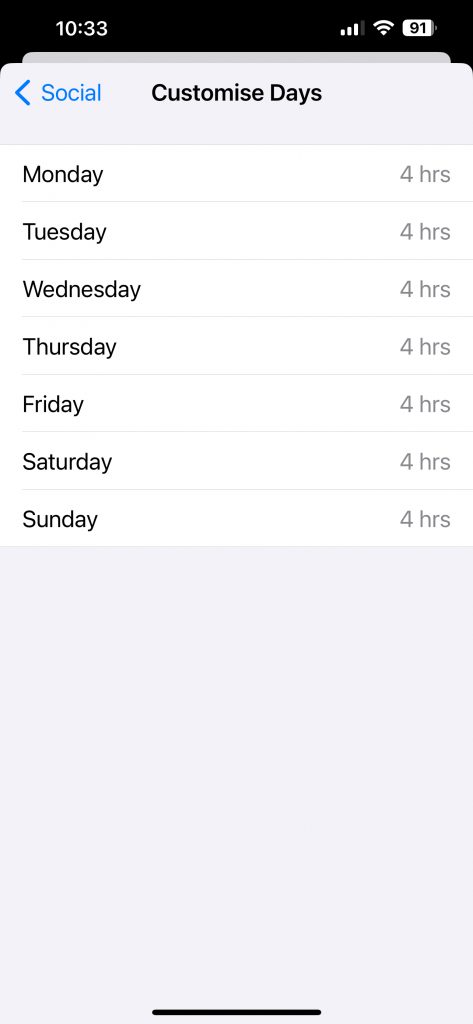
App Limits
You can limit usage of not only specific apps but app categories. For example, you can enable that all social apps – including Instagram, Facebook, Snapchat etc – have a specific limit of usage on specific days. This is a customisable feature, and you can remove some apps from the category if you don’t want a limit on that specific app, such as if you want to limit social media apps but not WhatsApp.
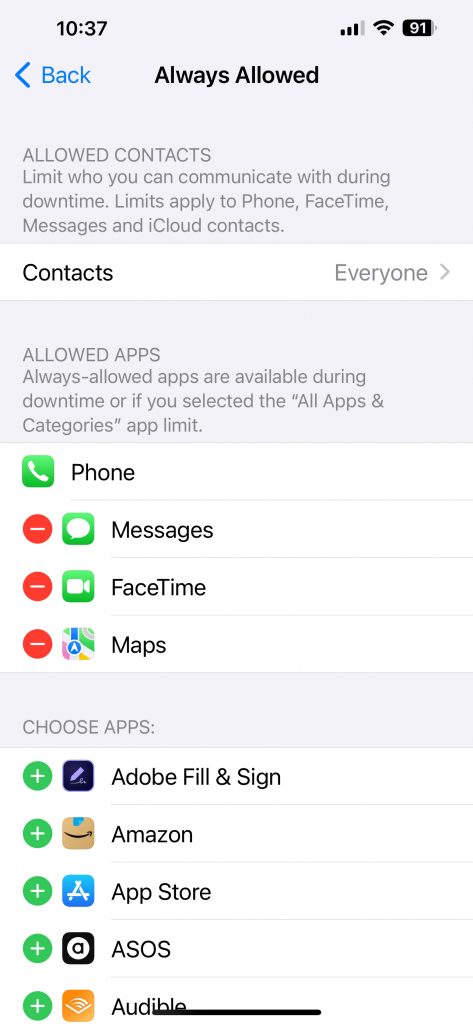
Always Allowed
Through this feature you can customise which apps are always allowed usage even if your phone is in downtime. This includes having the ability to personalise which contacts can communicate with you through phone, facetime and messages.
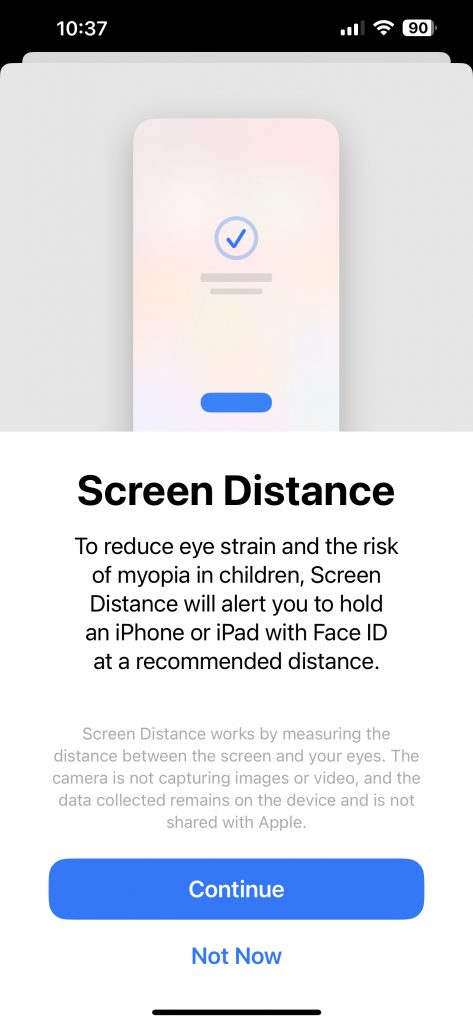
Screen Distance
A feature that you can choose to enable, screen distance helps measure the distance your phone is away from your face and will send you an alert if your phone is too close. This is to help reduce eye strain.
If you’re looking for more tips and tricks in reducing your digital usage, view our student digital champions digital detox results! Please note, these instructions are for Apple only and unfortunately, this function is not available for Android users. If you are an Android user, view our Student Digital Champion’s recommendation of ScreenZen.
In today’s age, most of us rely heavily on technology. While the digital world offers endless possibilities and conveniences, it’s crucial to remain mindful of its potential impacts on our digital wellbeing. As today is University Mental Health Day, it’s a perfect day to share with you a selection of tips and resources to help you achieve a healthier relationship with technology.
Have you ever worked on a large Excel document where you’ve scrolled down to find a figure, but then you’ve had to scroll back up to the top again to remind yourself of what the headings was for that column?!
There’s an incredibly useful function in Excel that can help with this issue, which enables you to freeze single or multiple rows and columns. You can access this feature within Excel by clicking View > FreezePanes.
Watch the video below to learn how to freeze columns and rows:
Blogpost by Noel Czempik (Student Digital Champion)
Have you ever felt like your phone was controlling you more than you were controlling it? That was me, until I hit a breaking point last year. Frustrated by the failed attempts to reduce my screen time and the feeling of being stuck in a digital world, I embarked on a digital detox journey throughout December – you can read about it here.
In this blog post, I’ll share my experience, the highs and lows, and the lessons I learned from reclaiming control over my digital habits.
👍 Positive changes from my detox
Less, not more, loneliness. I never realised how much social media drained my social battery. After some time without it, I found it easier to go out and interact with people, and I certainly didn’t miss the FOMO.
Better emotional awareness. I thought using my phone helped regulate my emotions, but it was just a distraction. After an unpleasant adjustment, I could recognise and process my feelings more healthily.
A new morning routine. I thought I didn’t have one, but my morning routine was using my phone. Once I stopped, I found it easier to do other things, like journaling with a cup of tea.
Effortless productivity & creativity. I could get a lot done in those little moments when I would normally pick up my phone. I also had the headspace to come up with my own solutions rather than seeking them online.
Better rest. The quality of my sleep improved, and I found little breaks throughout the day more restful.
Living in the moment. I found it easier to enjoy the everyday moments, and the time seemingly slowed down.
👎 Some of the downsides and challenges I experienced
My digital habits migrated to other apps. For a while, I found it difficult not to replace social media with YouTube or even scrolling through my photos or messages. I found the ScreenZen app to be very helpful – read my review of the app here.
The adjustment period. For some time, I felt irritable and bored and craved using my phone all the time. I needed to re-learn how to spend my time and be patient.
The inconvenience. I was surprised how much I needed to use my phone to check the time, set the alarm or timer, use two-factor authentication, or pay for things.
Missing out. Many events, such as local gigs or club and society events, are only advertised online. I found out about many opportunities after they happened, and even when searching proactively, most search results took me to social media sites, which often required logging in to access the full content.
My advice for those interested in doing a digital detox
It doesn’t need to be perfect. Even if you need to use devices for work/study or if you slip up in your commitments, not all is lost – you can still majorly benefit from the experience.
Tweak as you go. You may need to adjust your expectations if things don’t exactly go as planned, this isn’t a failure. Celebrate small successes and find what feels good to help you build sustainable habits.
It’s not all bliss, but not all boredom, either. There will be moments when you’ll want to quit and moments when you won’t regret a thing. Your experience and everything you learn about yourself will be unique, perhaps the most valuable thing.
It is extremely important that everyone has the choice to work on their computer in the language they wish. On St David’s Day, I want to share with you some of my favourite tips for making working in Welsh on your computer much more convenient.
Tip 1: Change your computer language to Welsh
One of the first things you can do is change your computer’s display language. This will change your computer interface and icons like Settings and File Explorer will appear in Welsh.
Follow the following instructions to customize your computer’s display language for Windows PCs, Mac computers, or if you are on a public computer on the campus of Aberystwyth University.
Additional suggestion: Did you know that you can also customize the display language of your mobile phone? Follow the following instructions for your AndroidorApplephones.
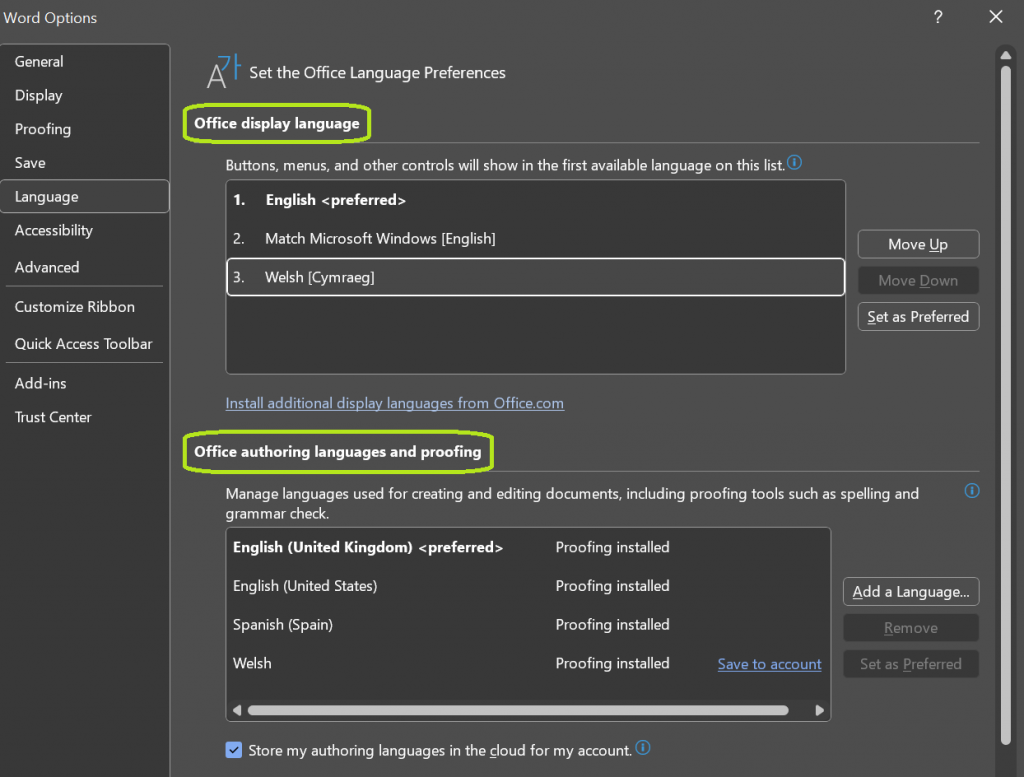
Tip 2: Change the language of specific software to Welsh
If you don’t want to change the language of your computer, there is also an option for you to change the language of certain software, and you can do this in any Microsoft Office programme (e.g. Word, Outlook, PowerPoint, etc.). You have the choice to change the display language and to change your authoring and proof-reading language. Follow the following instructions to learn how to change specific software language.
Tip 3: Using the to bach app
While writing in Welsh, have you ever used the symbols button to find accents or circumflexes for letters? You don’t need to do that anymore!
You can download the to bach software on your work computer from the software centre or on your Personal computer, then hold the Alt Gr key and press the vowel you wish to add a circumflex to it:
Keystroke
Symbol
Alt Gr + a
â
Alt Gr + e
ê
Alt Gr + o
ô
Alt Gr + i
î
Alt Gr + y
ŷ
Alt Gr + w
ŵ
Alt Gr + u
û
Tip 4: Change the proofreading language of your documents
If you haven’t changed the authoring and proofreading language of a particular software (see tip 2), you could modify the proofreading language of individual documents to ensure that spelling errors and simple grammatical errors are highlighted.
Watch the following video to learn how to change the proofreading language of your documents.
Tip 5: Spellcheck your text with Cysill
Cysill is part of the Cysgliad language software package that you can download to your computer. Cysill will allow you to find and correct Welsh errors in your text, and includes an useful thesaurus.
Read DigitalTip 2 where we give you instructions on how to download and use the Cysill app and the online version.
Tip 6: Additional Linguistic Resources
You can also find a plethora of terminology databases online. Here are some of the most popular ones:
TermCymru – a terminology database supported by the Welsh Government Translation Service.
In addition to the resources mentioned above, there is extensive information on the Centre for Welsh Services’ webpage on language resources.
Further Support 💬
If you would like to speak to a member of the Digital Skills Team about using your computer in Welsh, and for any help with any of the above suggestions, please do not hesitate to contact us by email (digi@aber.ac.uk), or call by our weekly Digital Skills drop-in sessions in the Hugh Owen Library.