Blogpost by Noel Czempik (Student Digital Champion)

With days getting longer and temperatures on the rise, many crave spending more time outdoors. To enhance your outdoor adventures, I’ve compiled a list of my favourite free apps that will hopefully spark your curiosity and deepen your appreciation for nature.
AllTrails
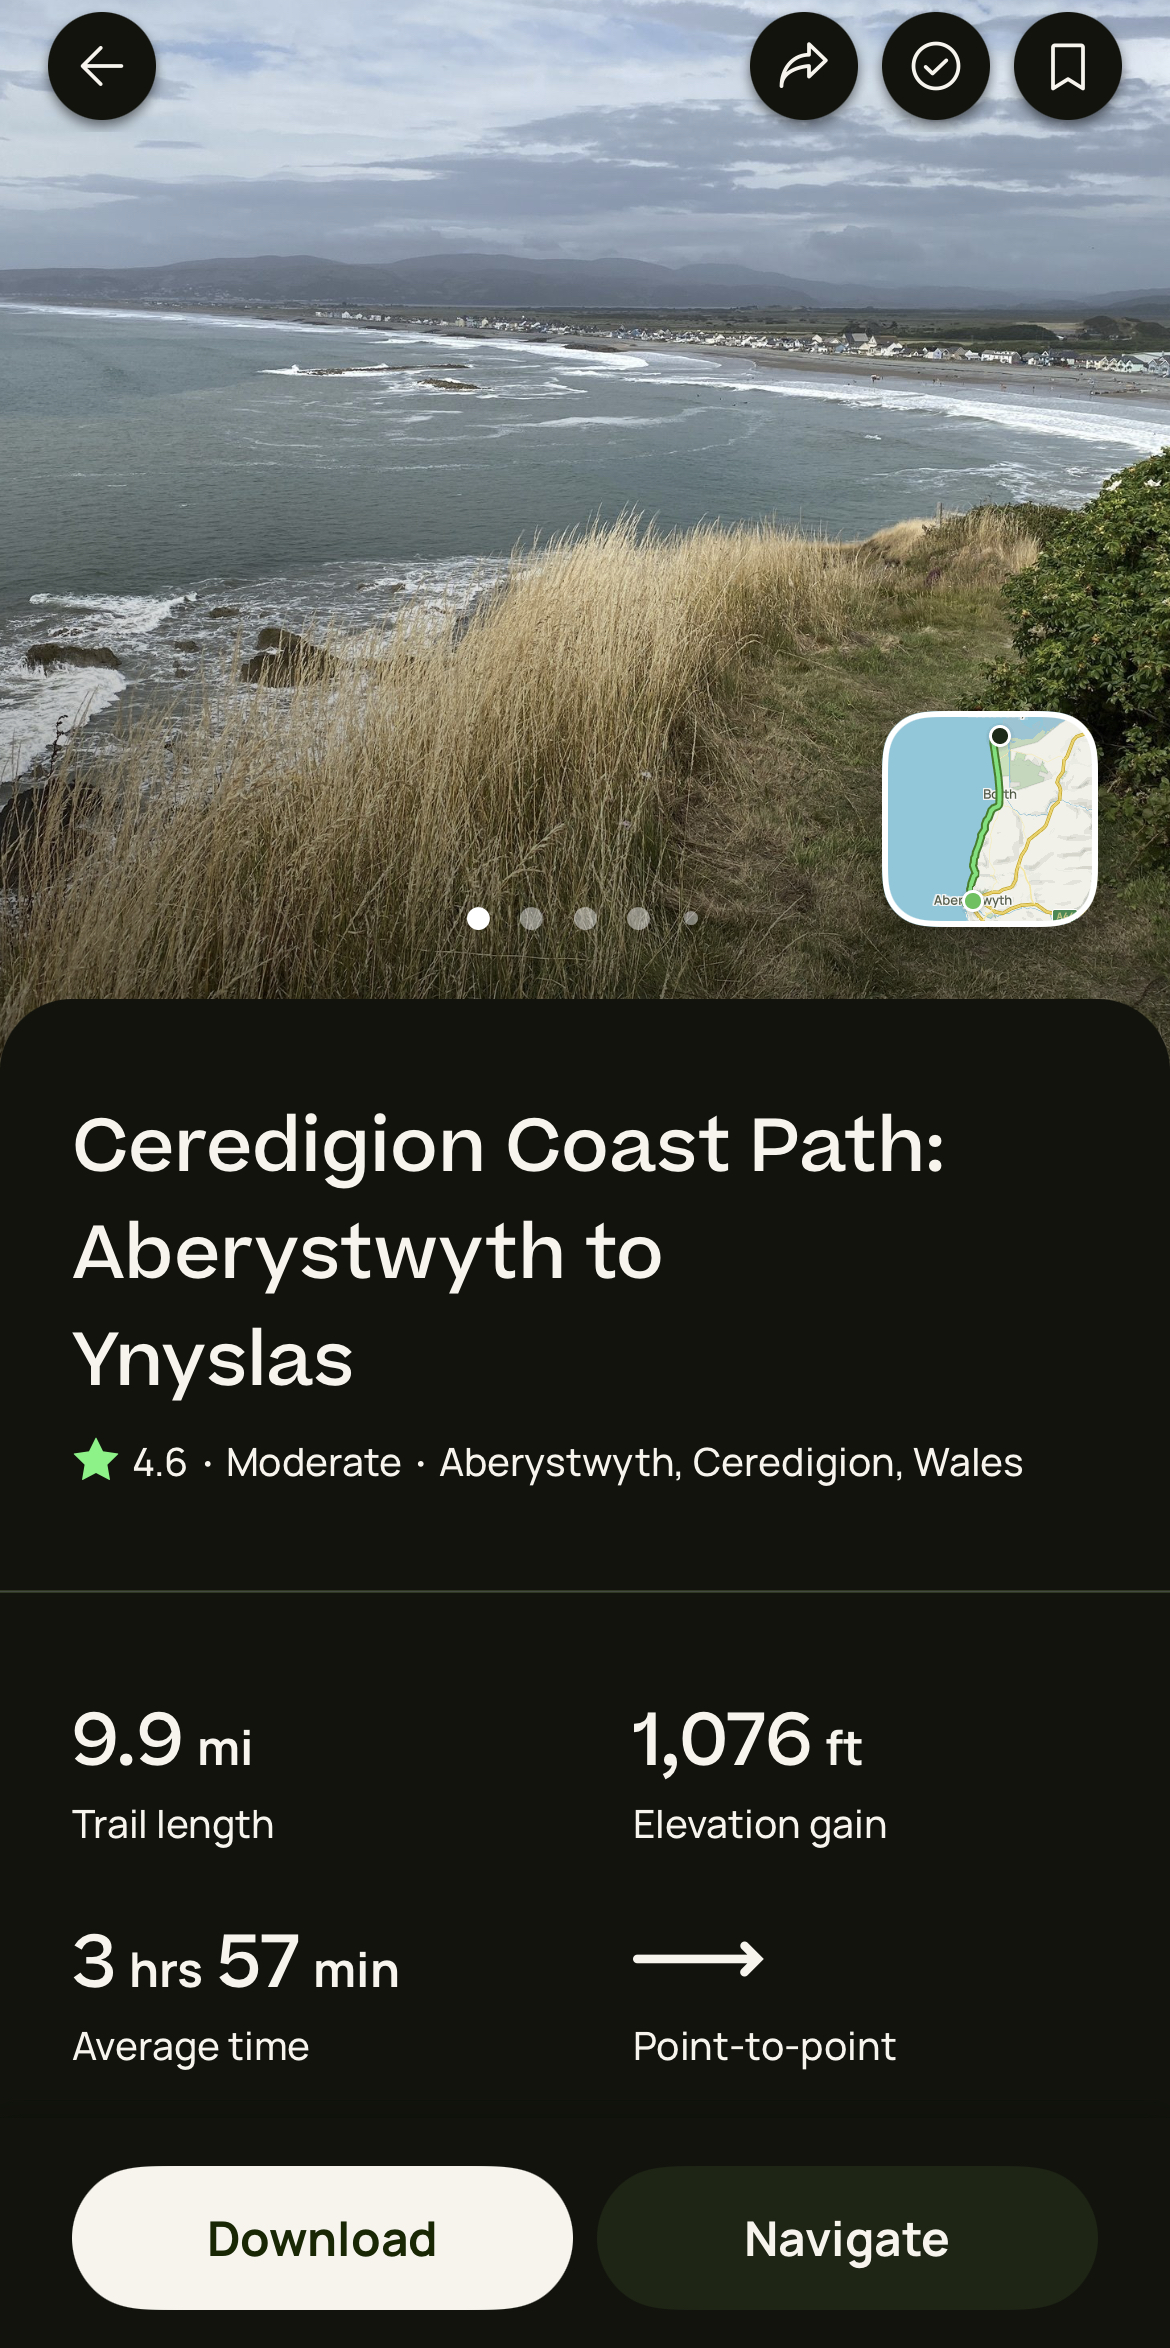
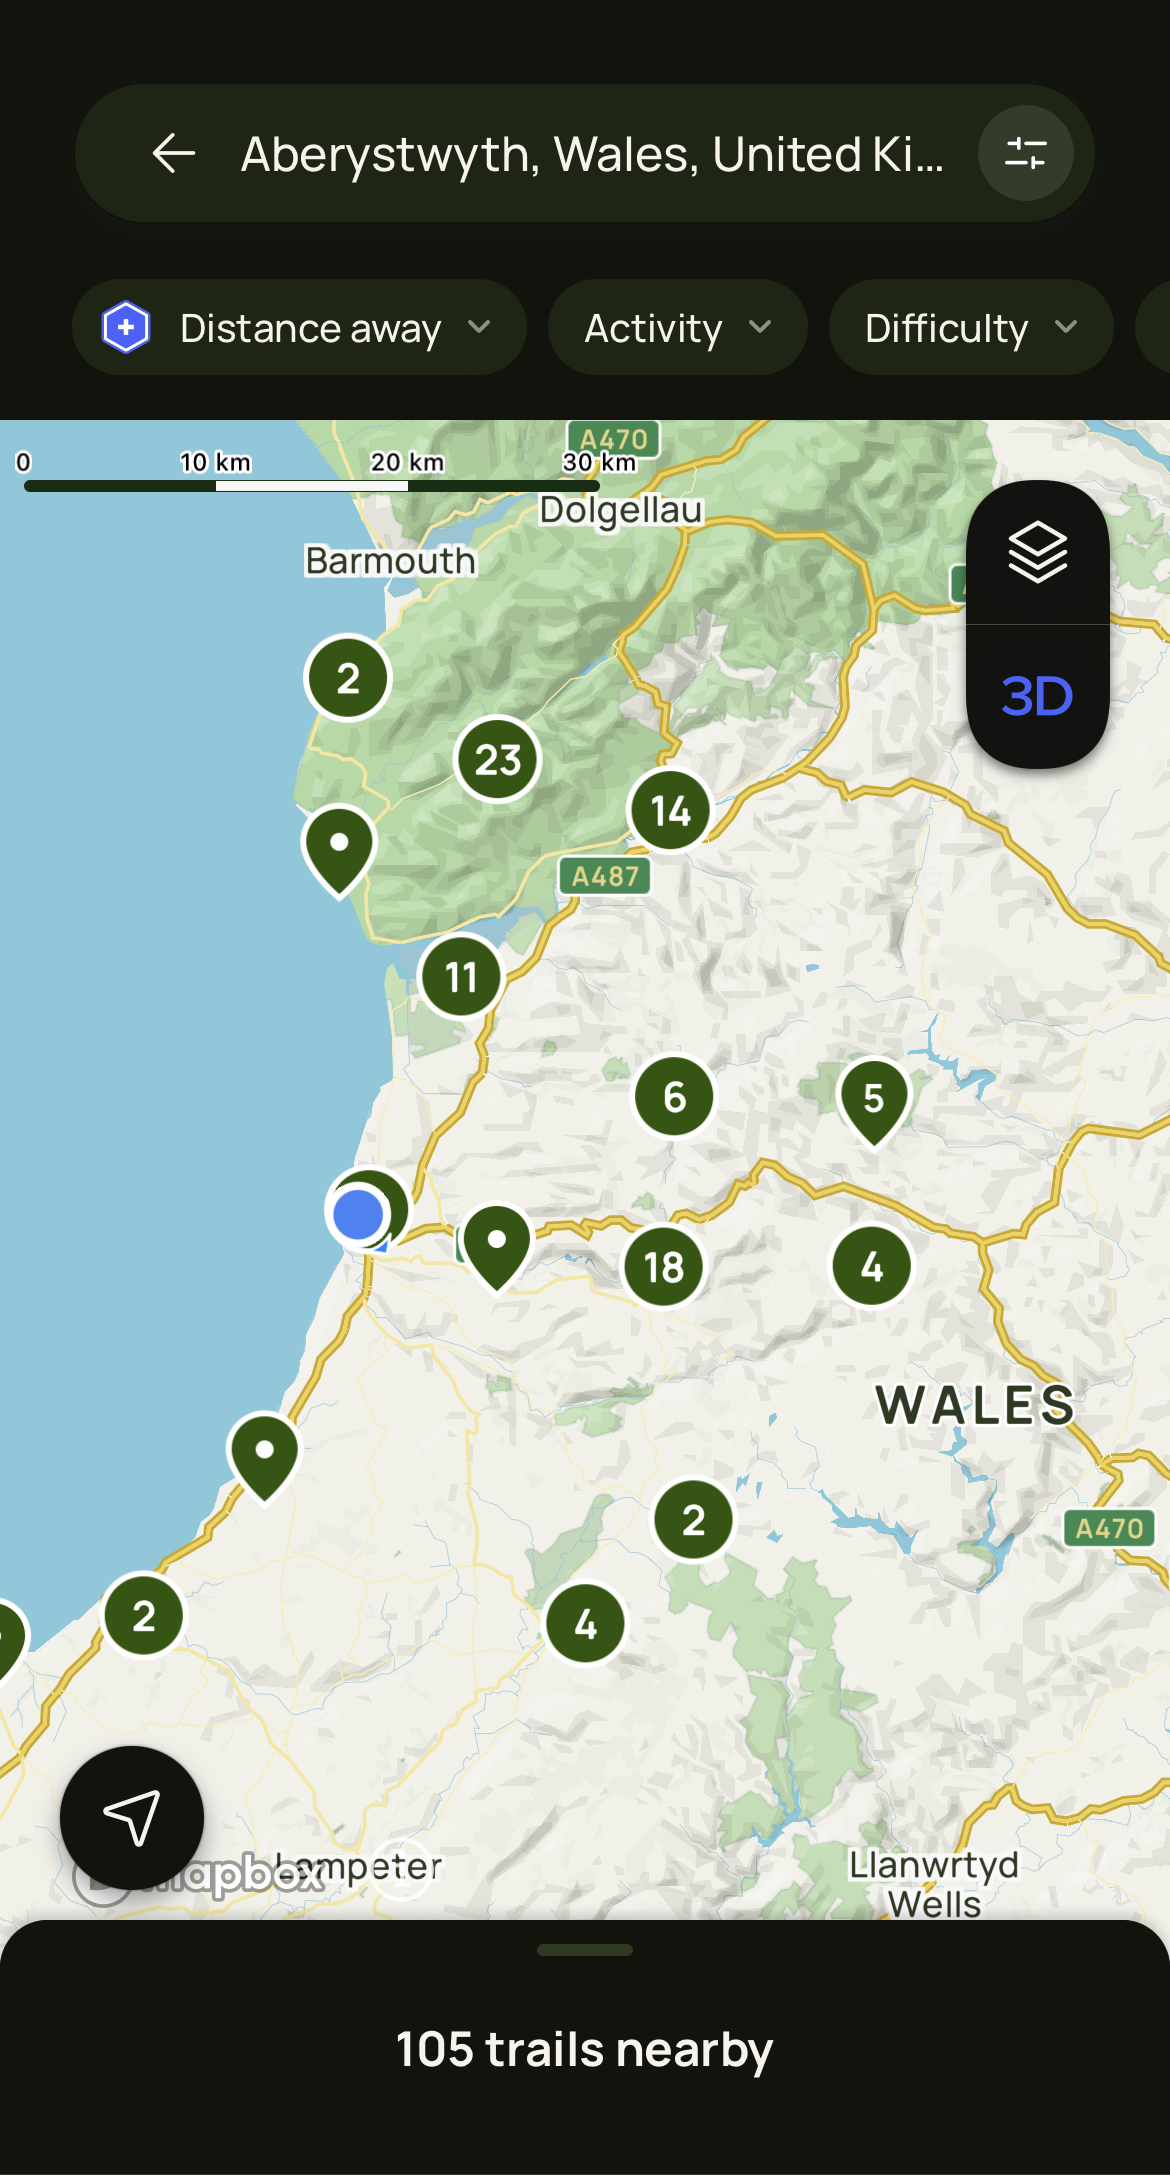
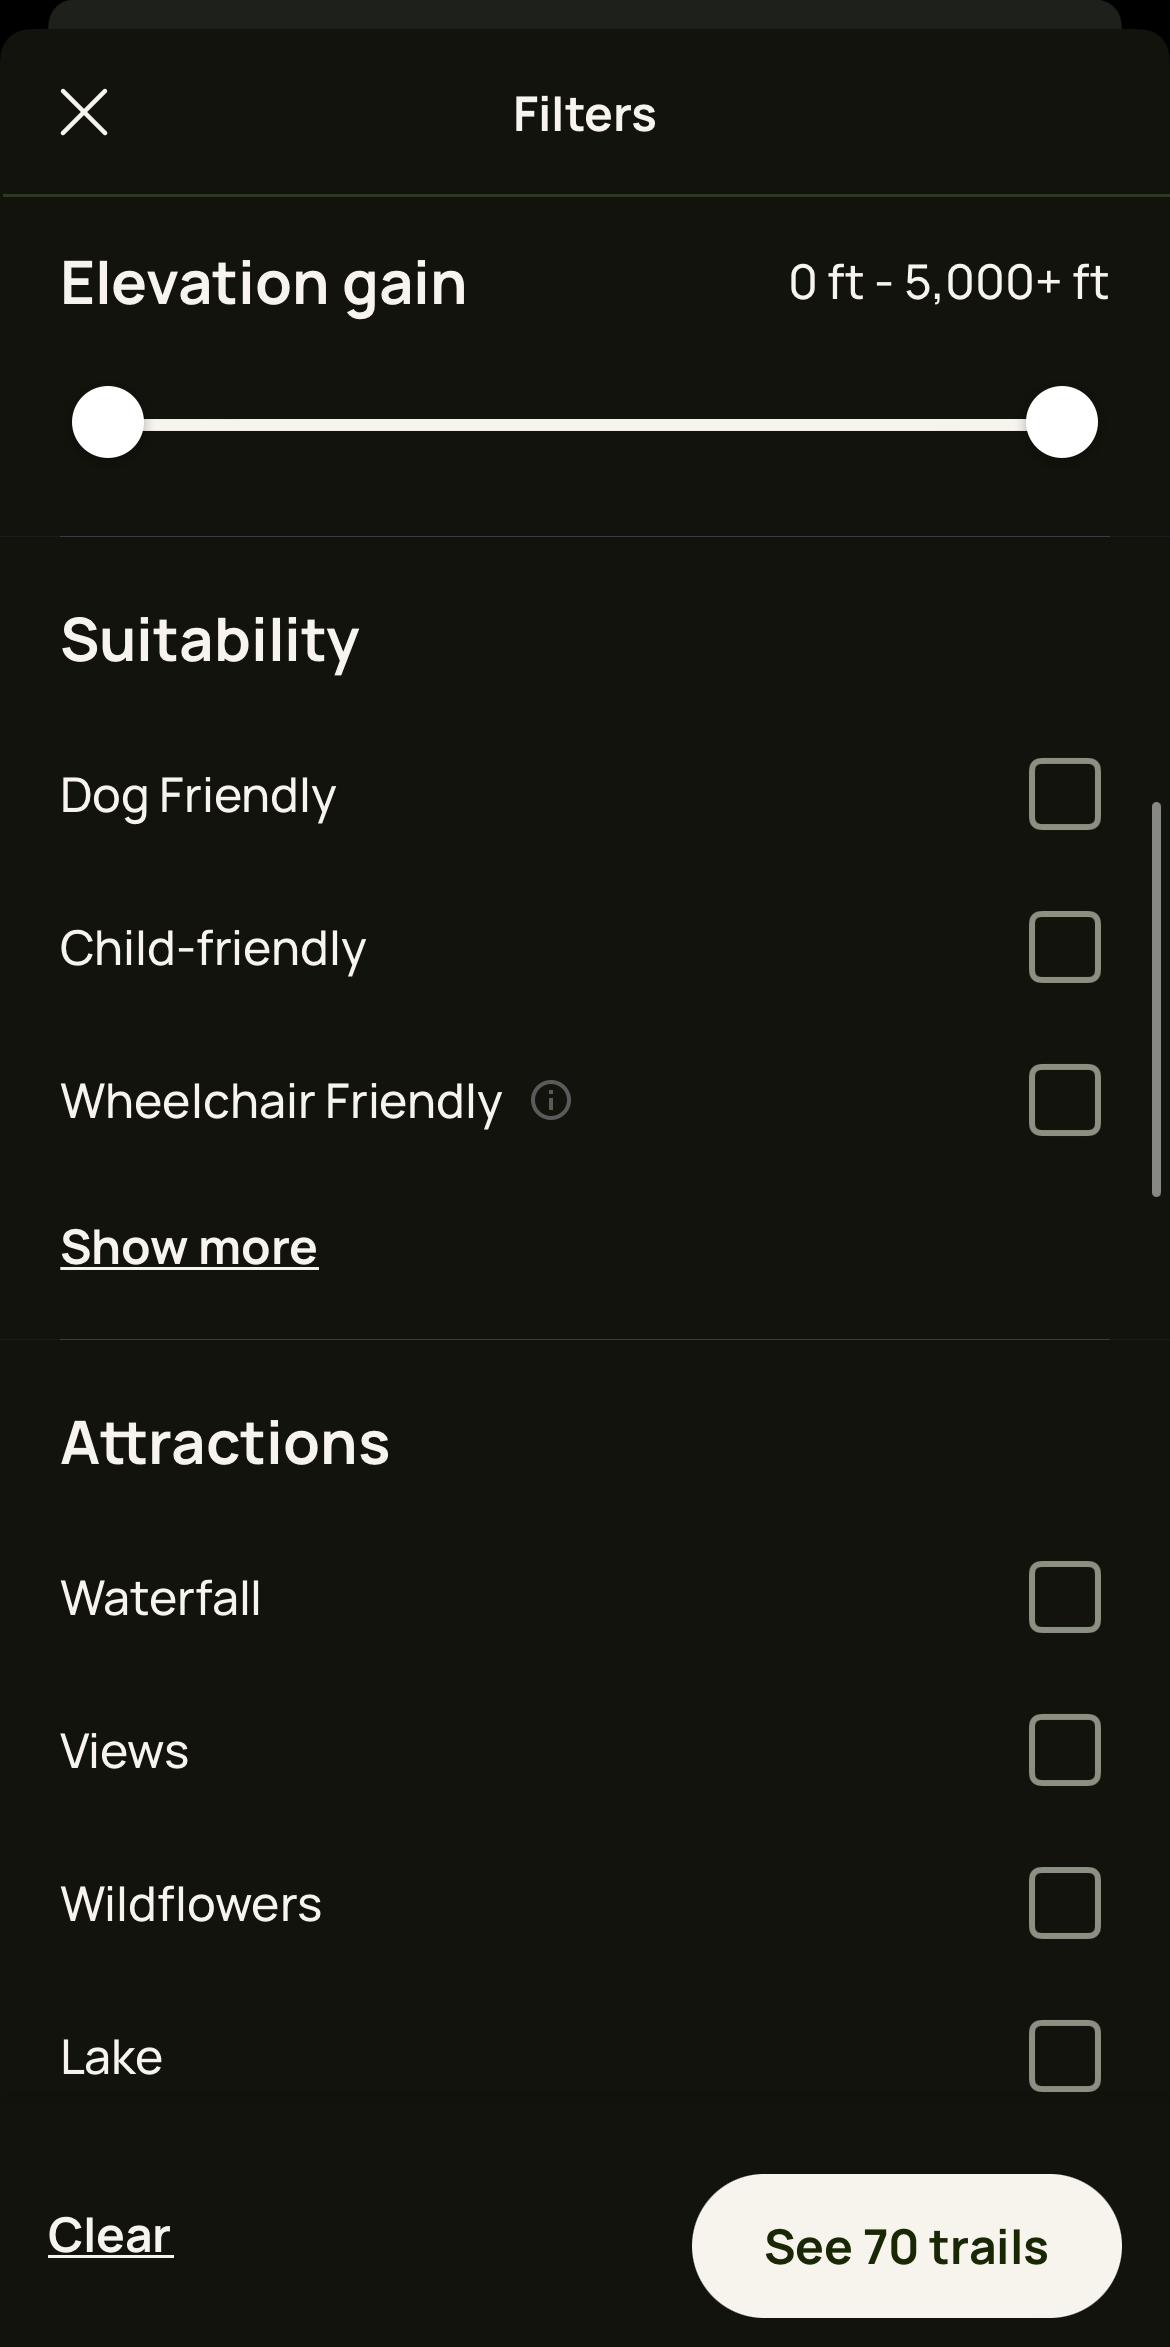
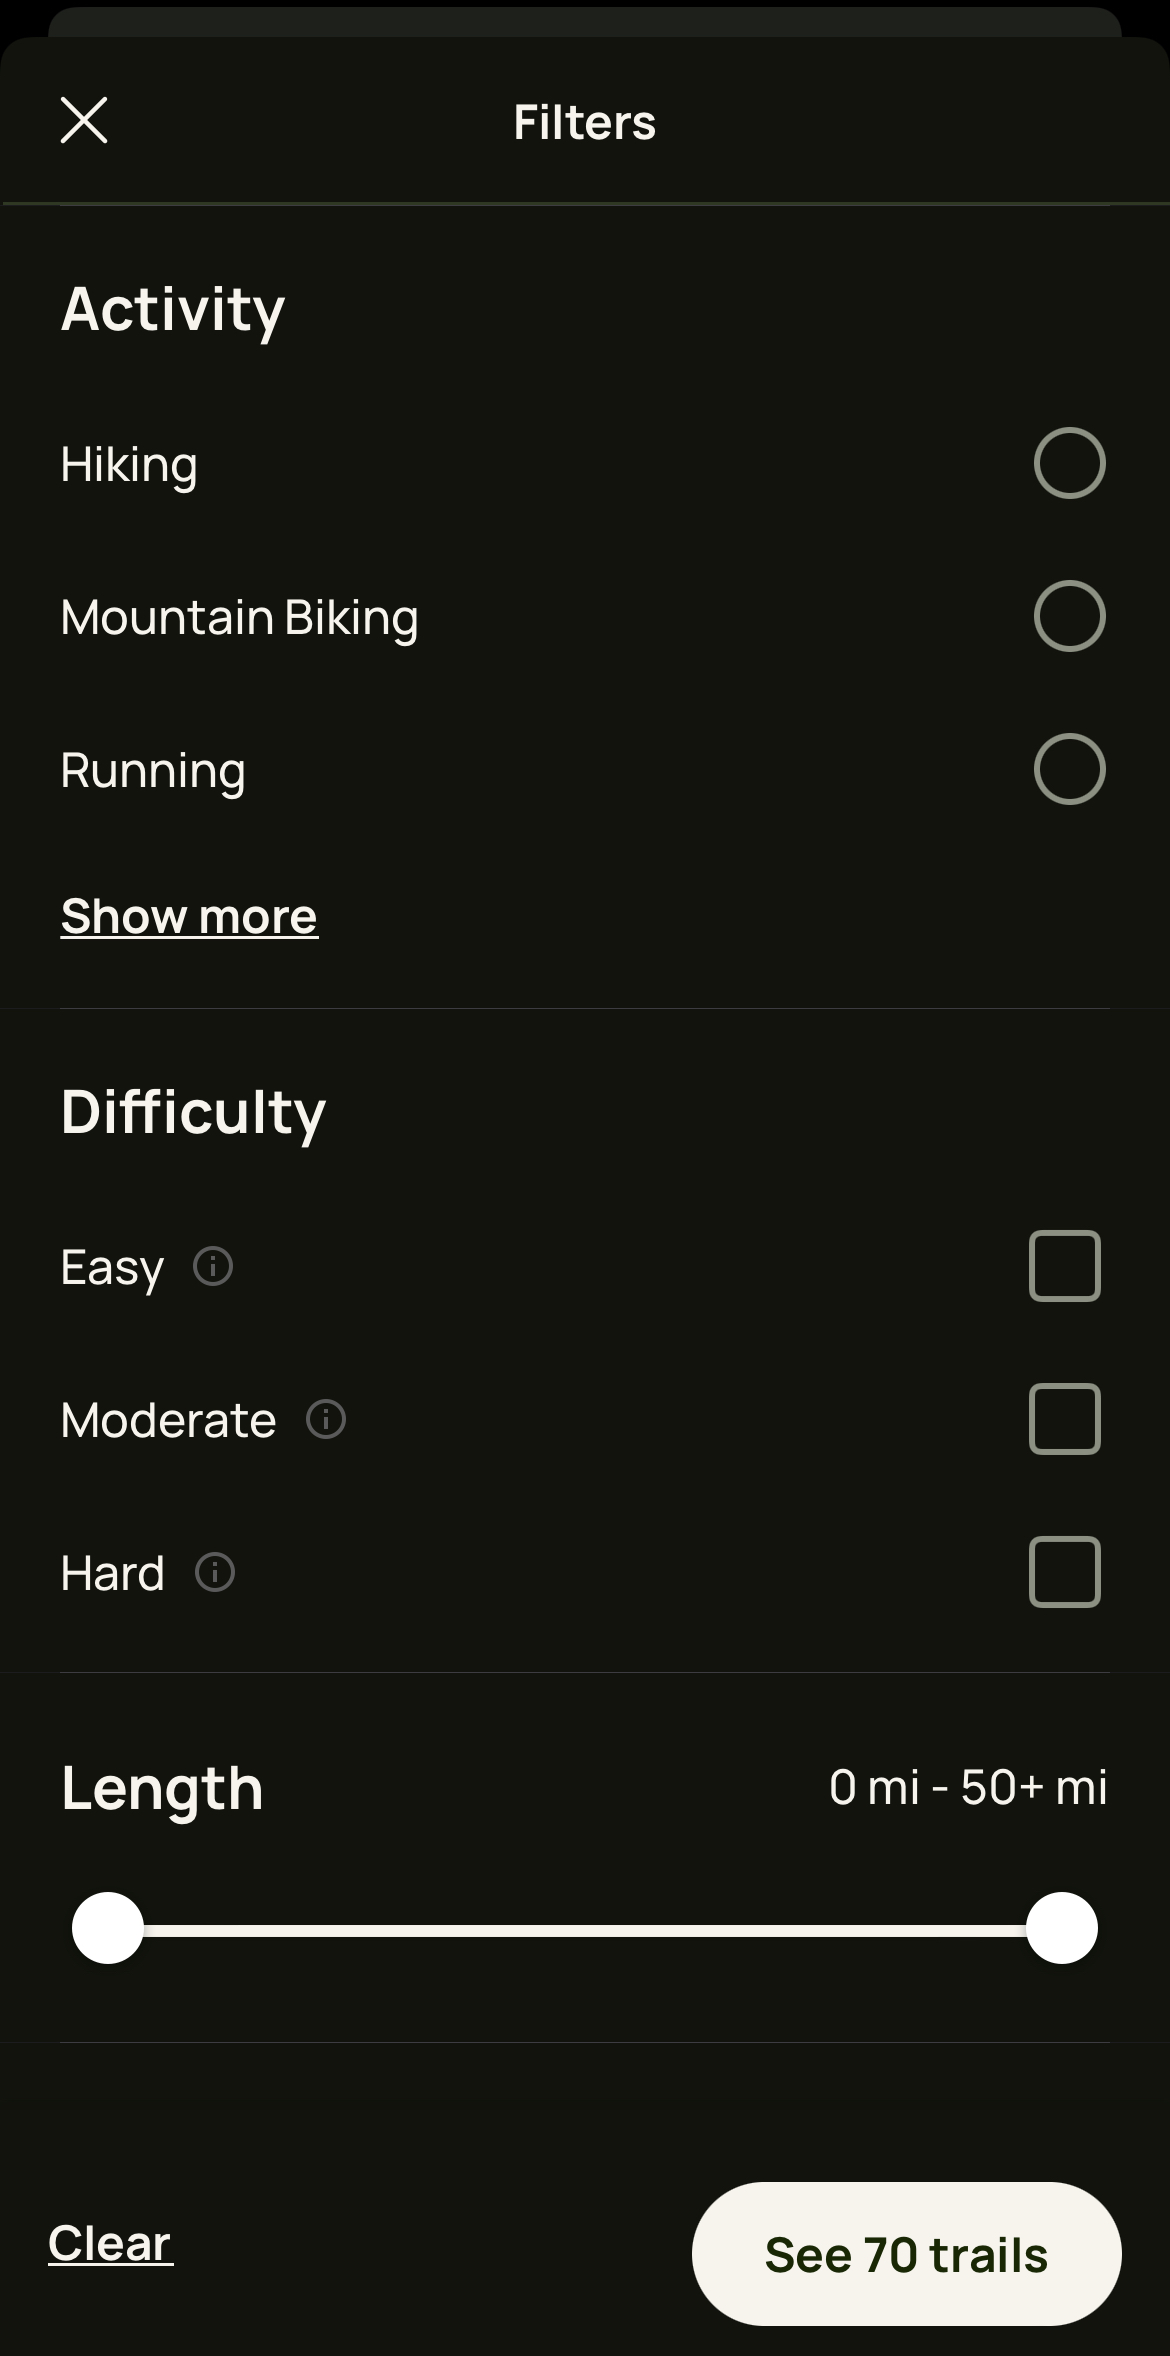
AllTrails is a pocket guide to walking trails, biking routes and nature spots suitable for various activity levels and abilities. The app allows you to plan your next adventure, whether small or big and helps you discover new places or return to your favourite spots!
These are some of my favorite features in the app:
- Search for trails by location and filter by type of activity, difficulty, accessibility and length.
- Access detailed trail information, including thorough descriptions of the pathways, current weather and ground conditions, and available facilities.
- Check out reviews and photos to help you decide if it’s the right trail for you.
- Save your favourite trails and share them with others in the app.
📲 Download from Google Play 📲 Download from the Apple Store
Seek by iNaturalist
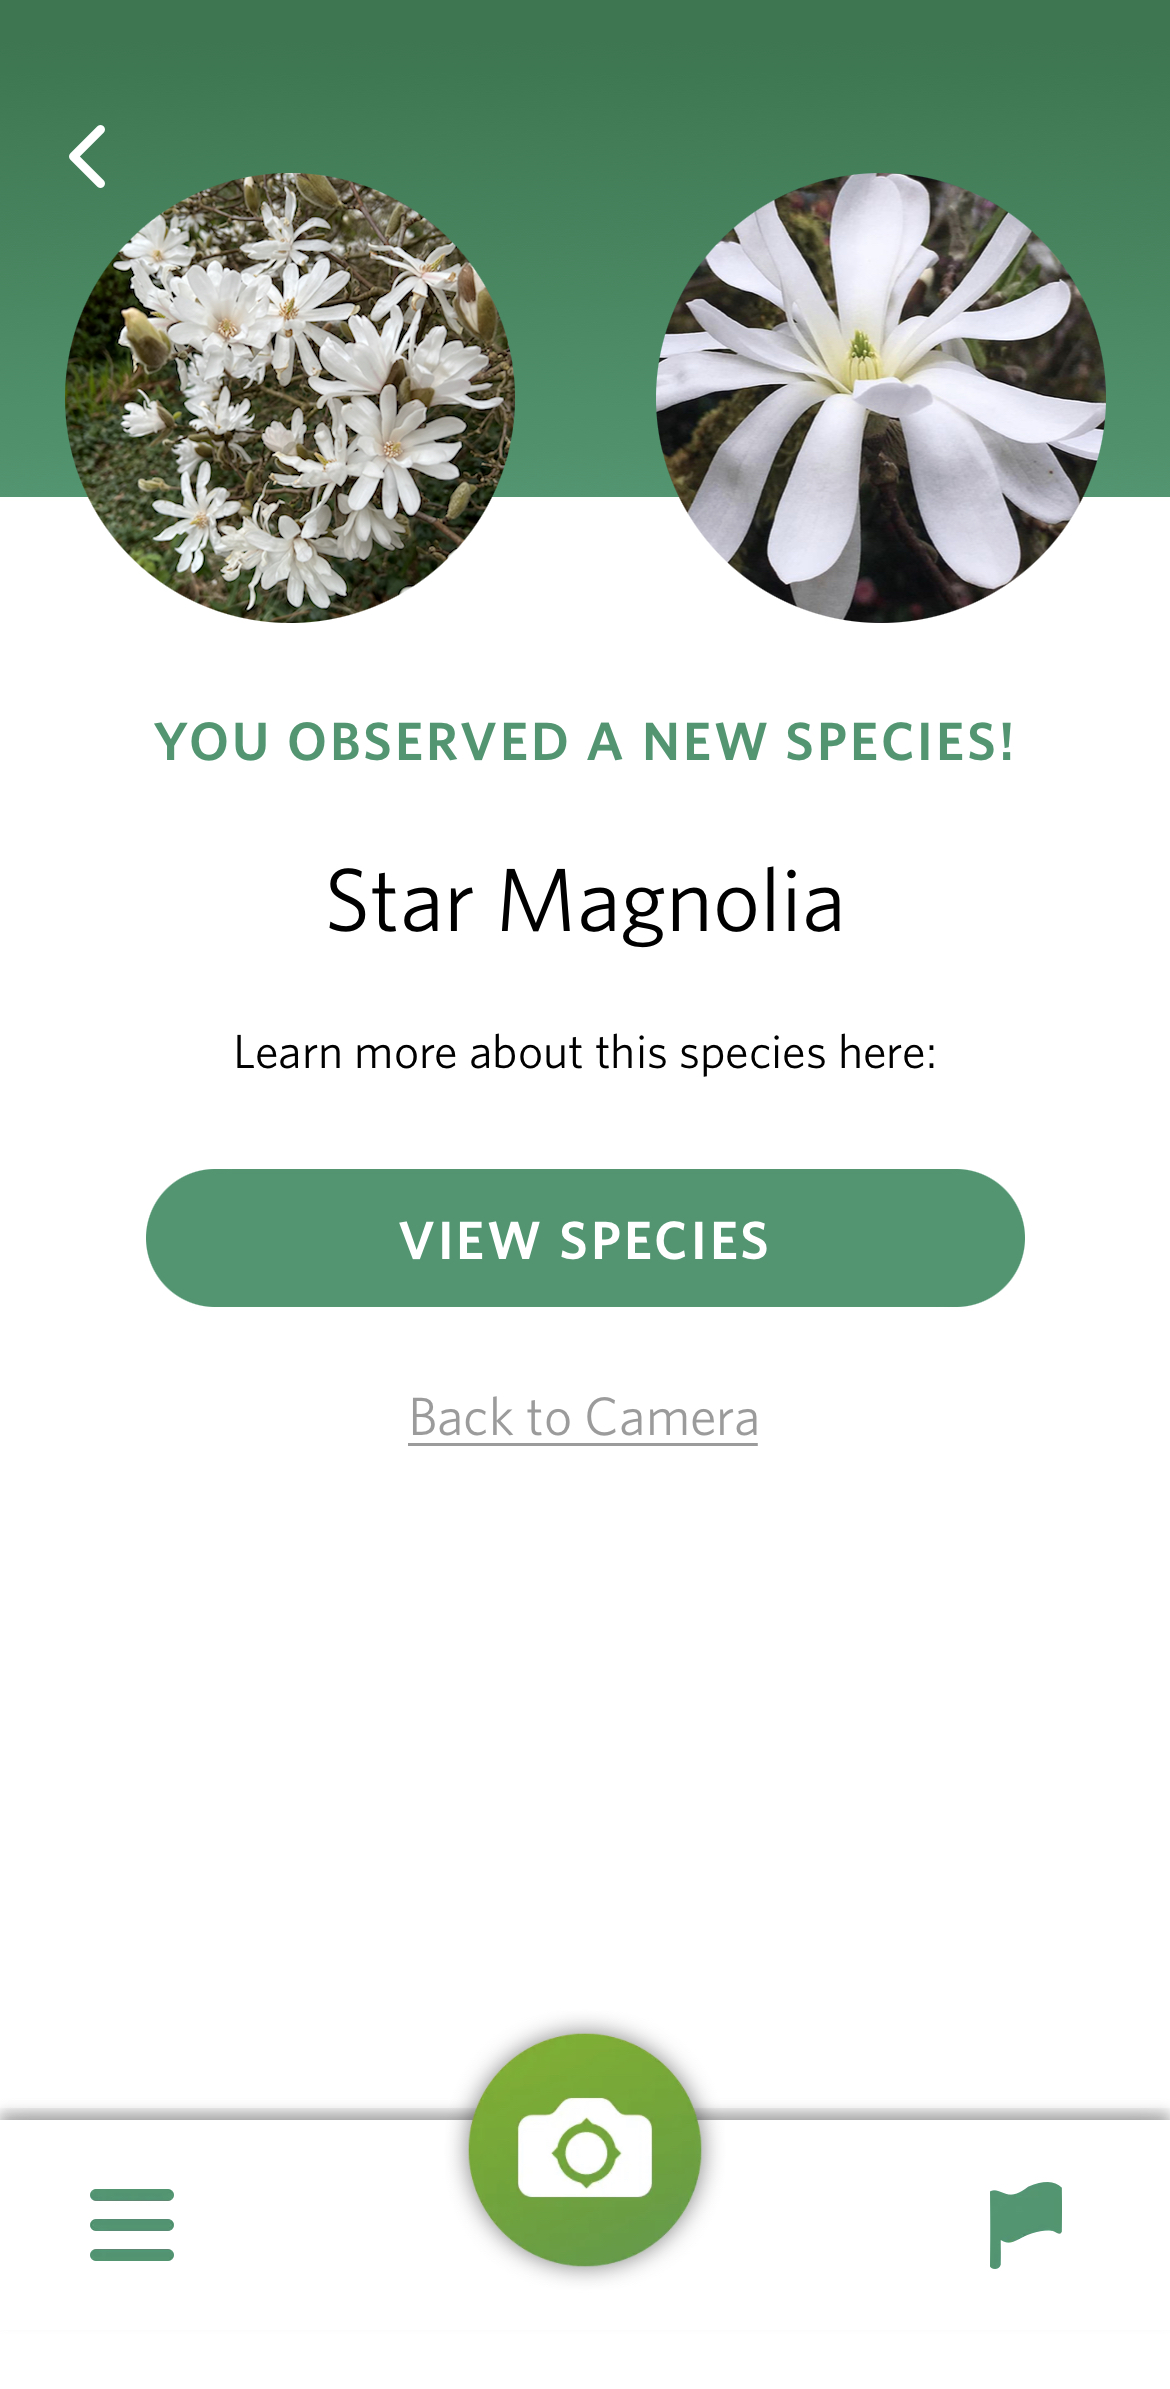
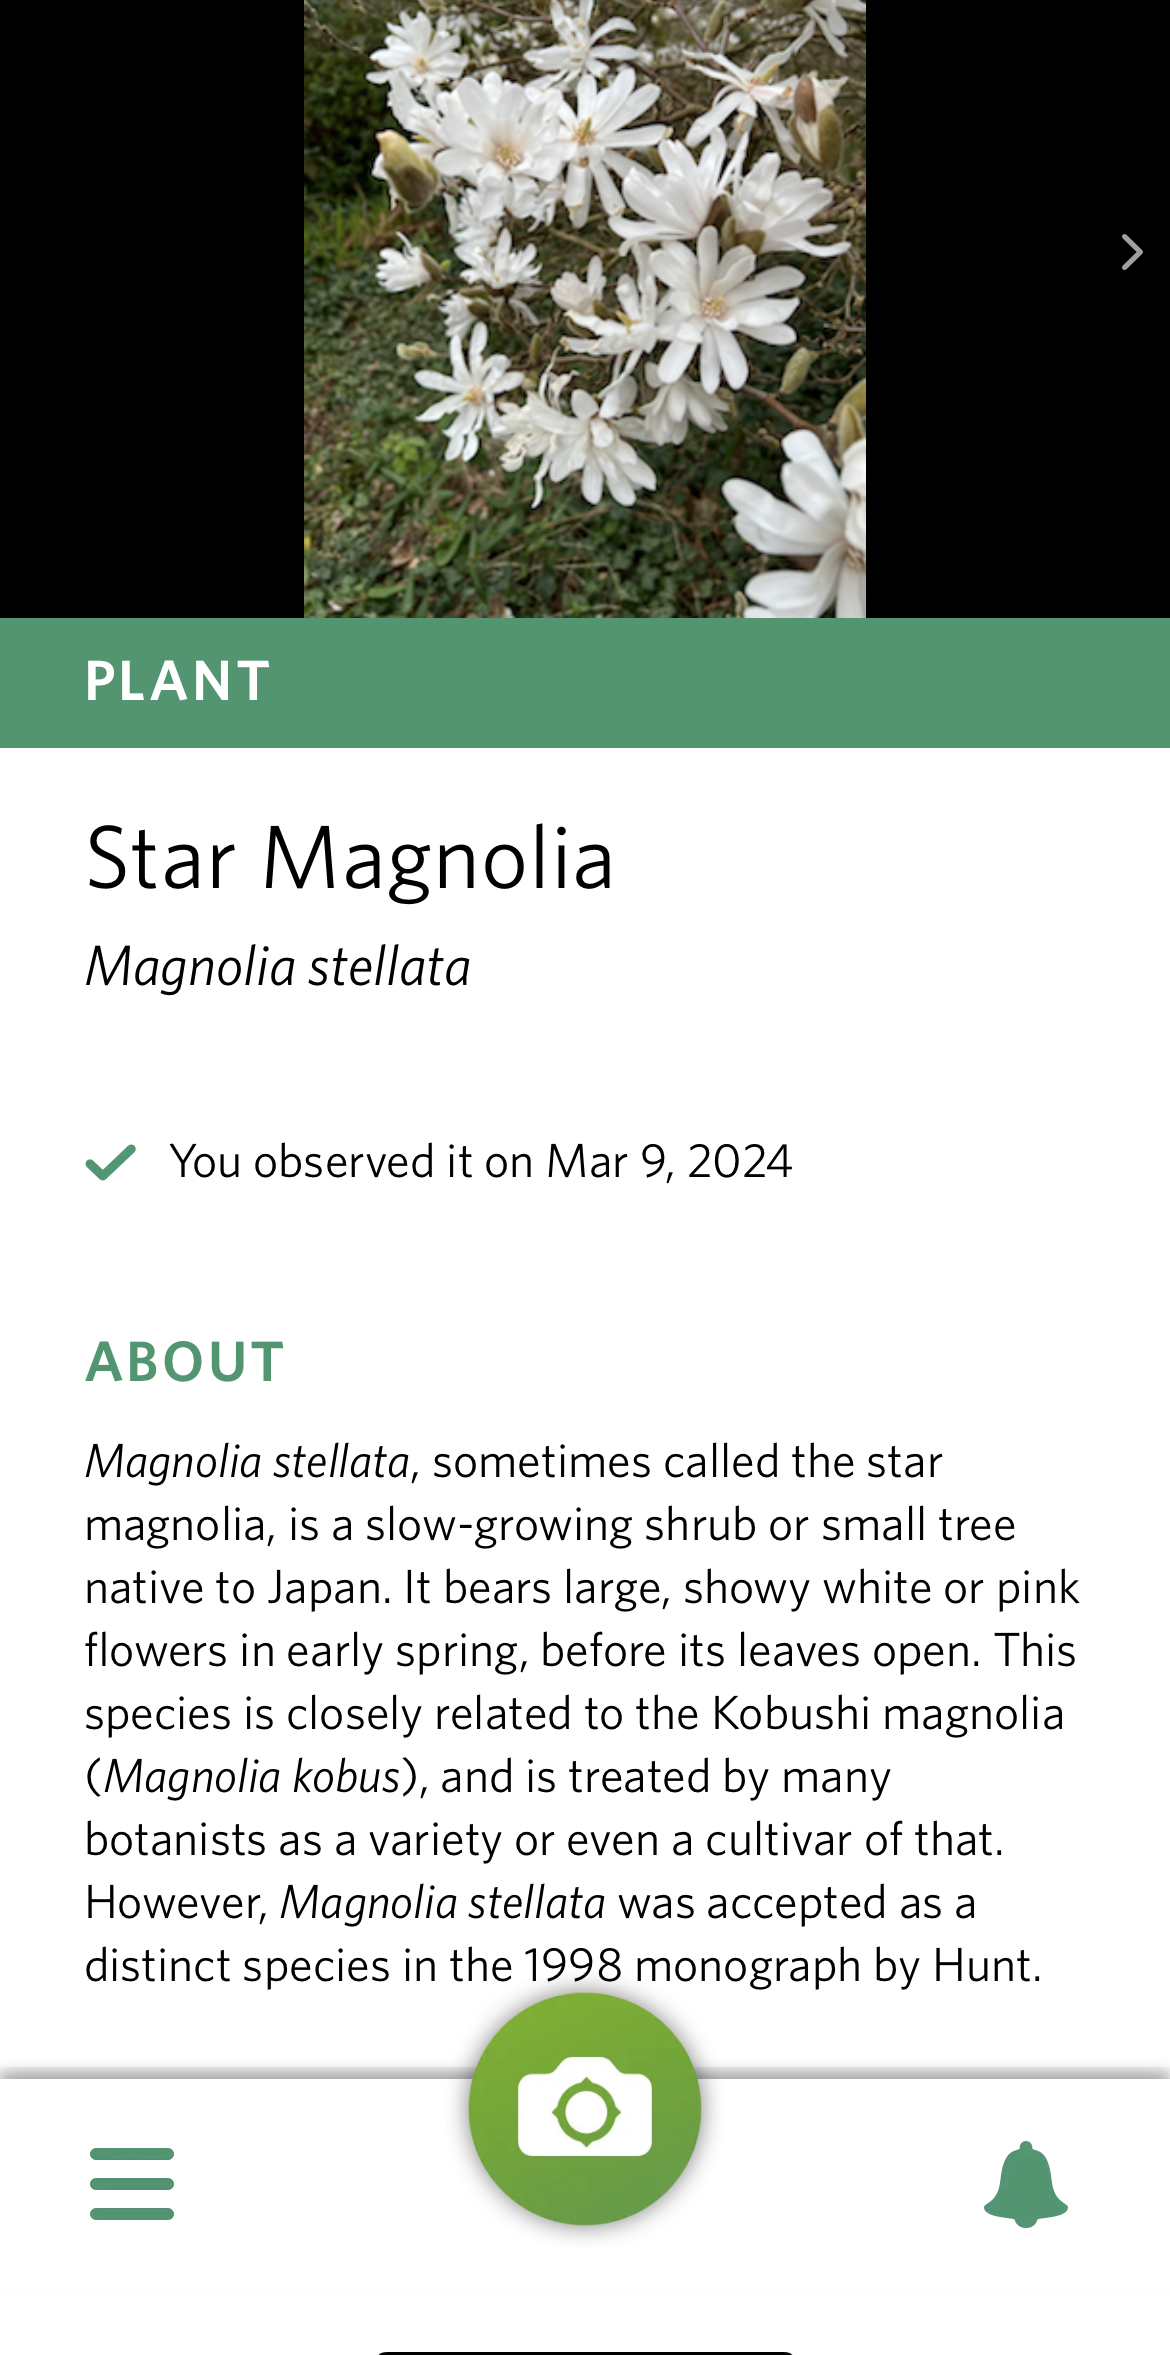
Have you ever seen a plant whilst out walking and wondered what it was? Seek allows you to effortlessly identify species of plants, animals, and fungi on the go. The app does not require registration; simply download it and point it at living things around you!
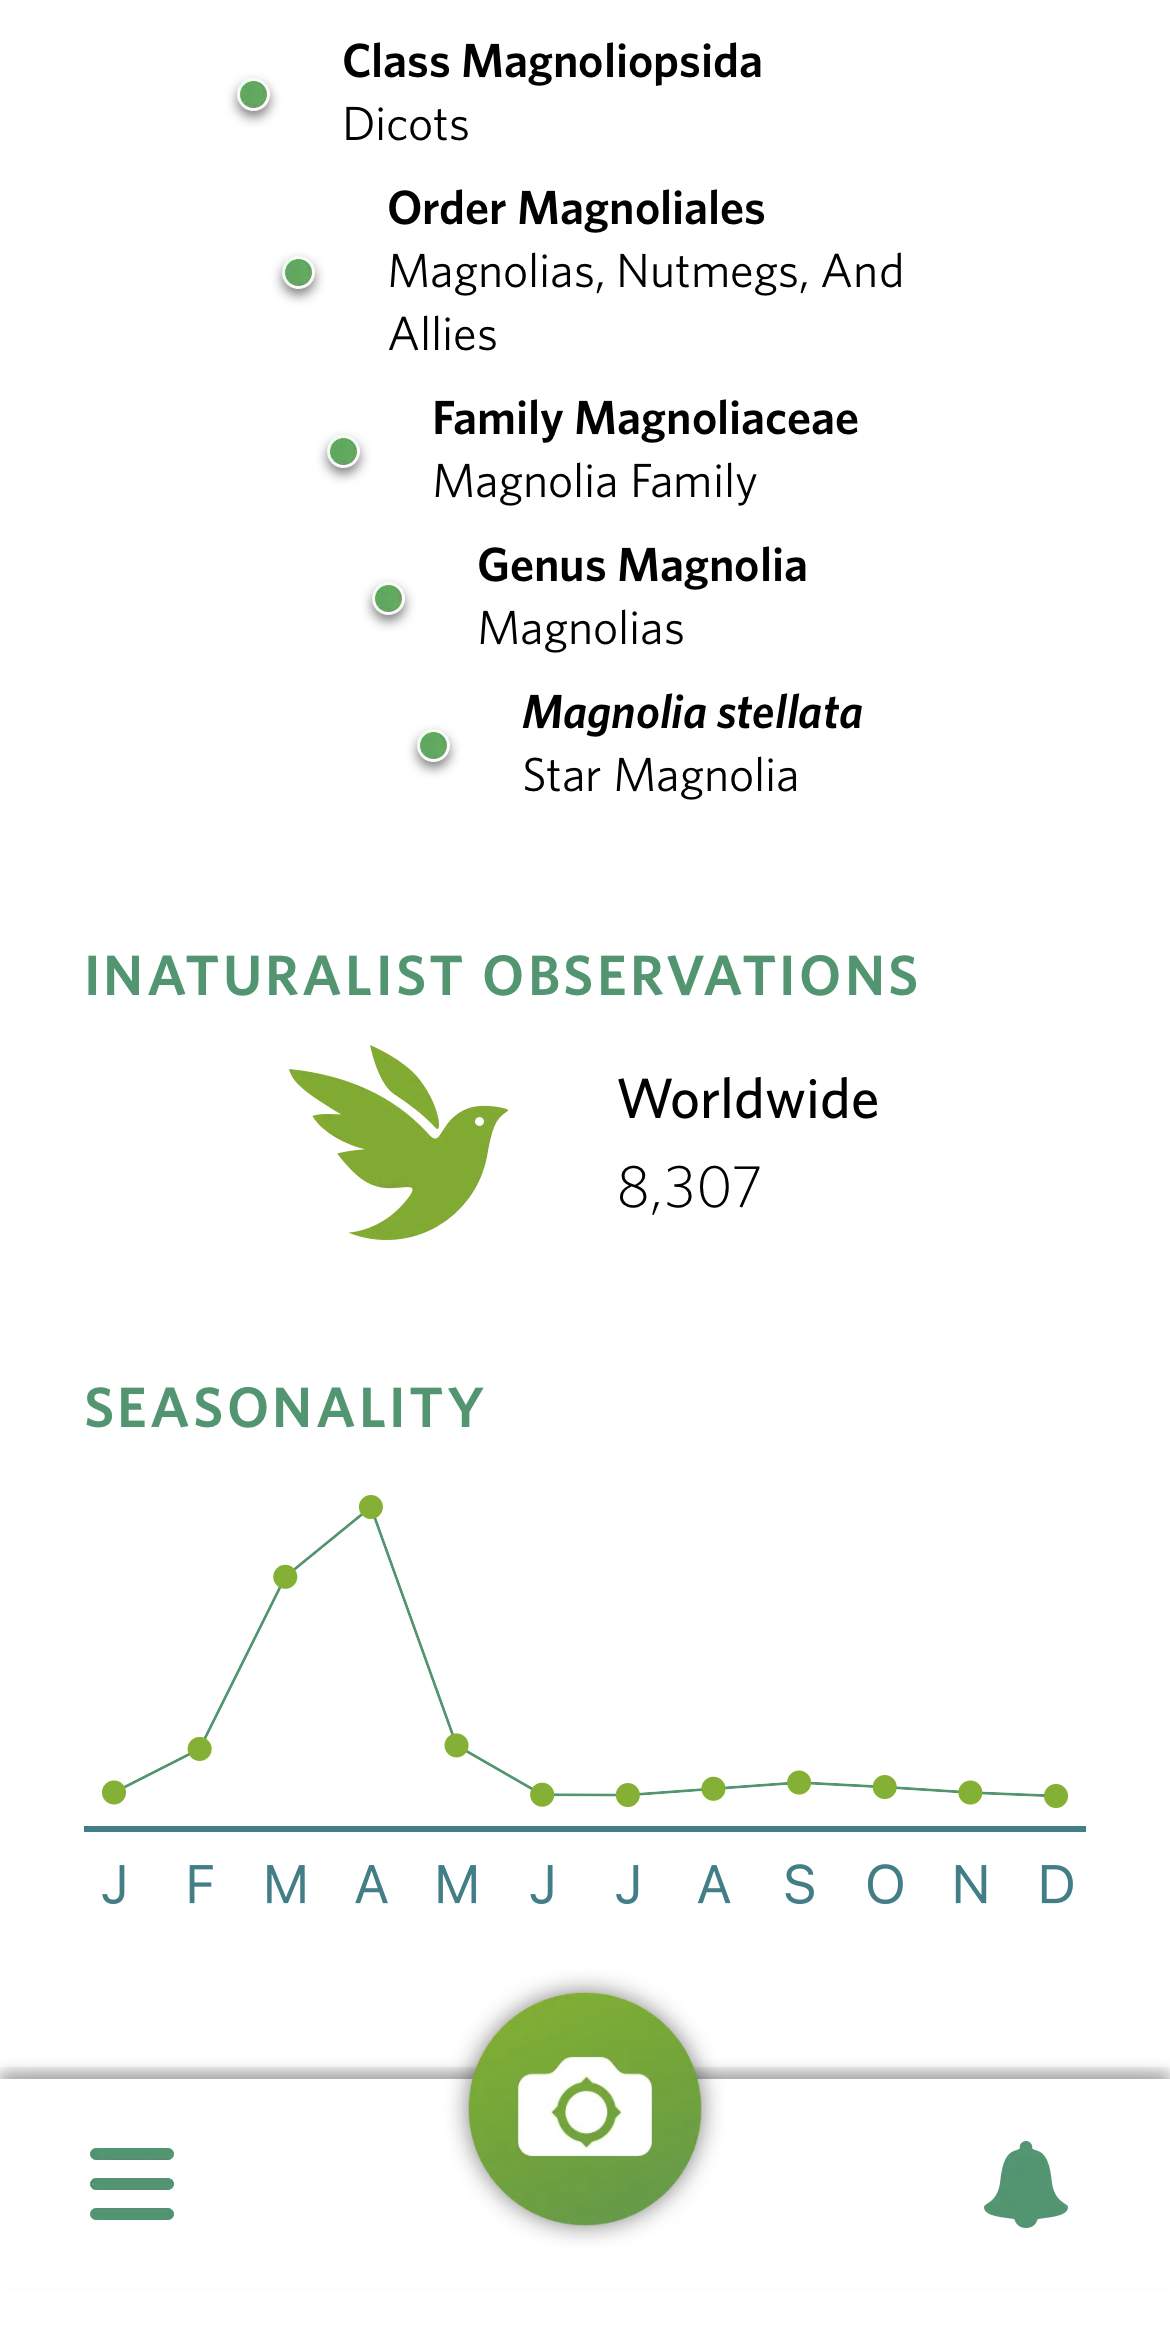
My favourite features in the app are:
- You can point the in-app camera at what you’d like to identify or take a picture and upload it to the app later.
- Learn more about the species’ taxonomy, seasonality, and geographical origin.
- Being able to engage with a community and share the species that you’ve found with the app. PlantNet is another app that’s useful if you want to be part of a citizen science project on plant biodiversity.
📲 Download from Google Play 📲 Download from the Apple Store
SkyView Lite
The final app I’d like to share with you is SkyView Lite. This app contains an interactive sky map that allows users to recognise stars, planets and other celestial objects. The app is intuitive, accurate and easy to personalise. In Wales, weather can often be unpredictable, and clear skies often come as a surprise. With SkyView at hand, you can take full advantage of spontaneous stargazing!
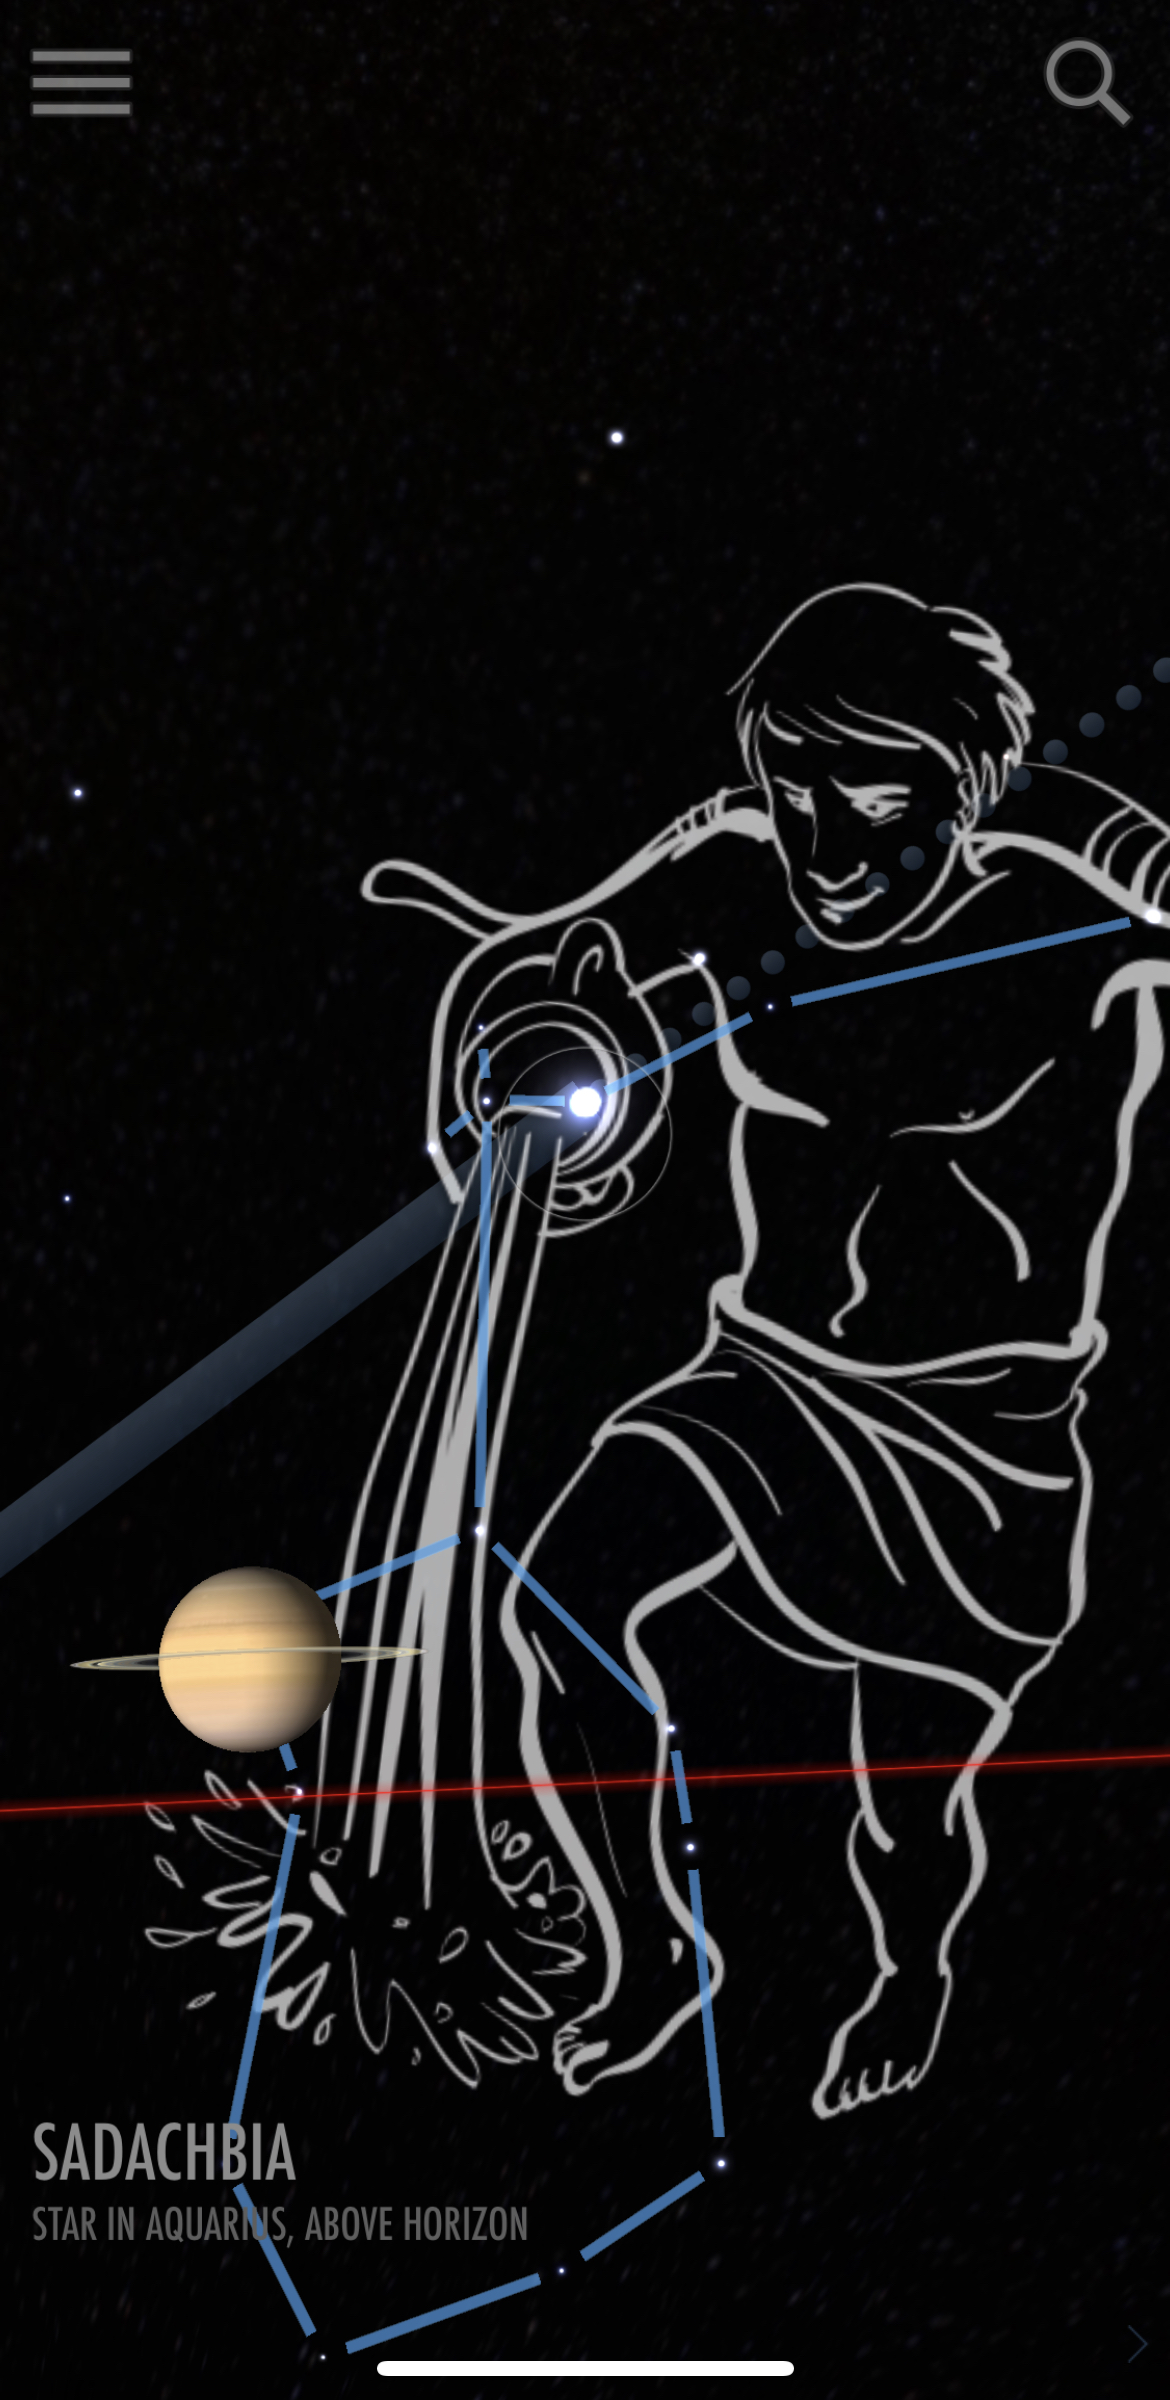
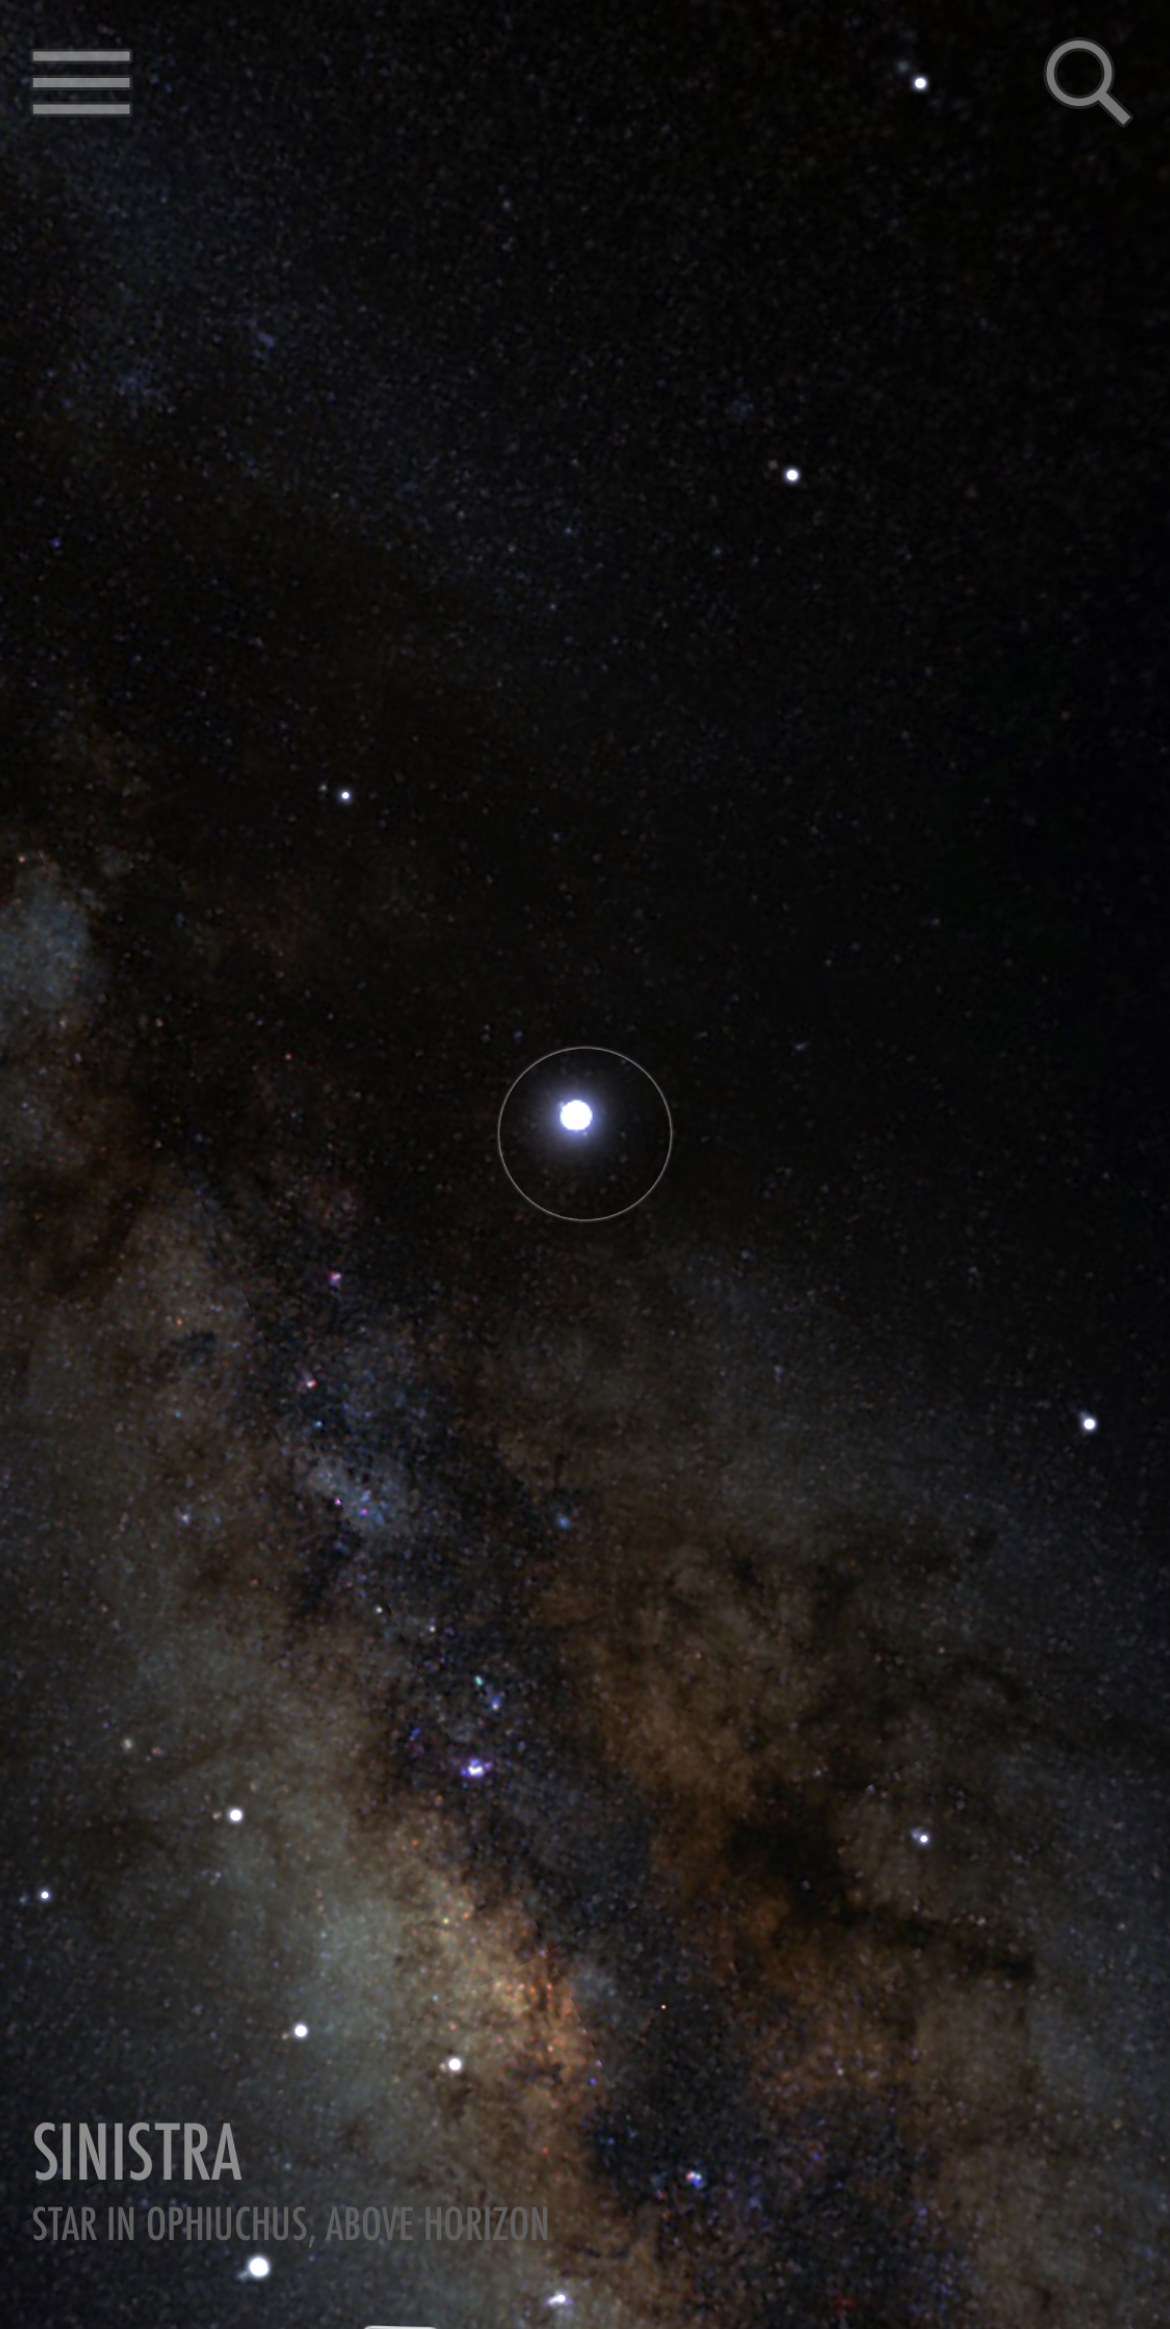
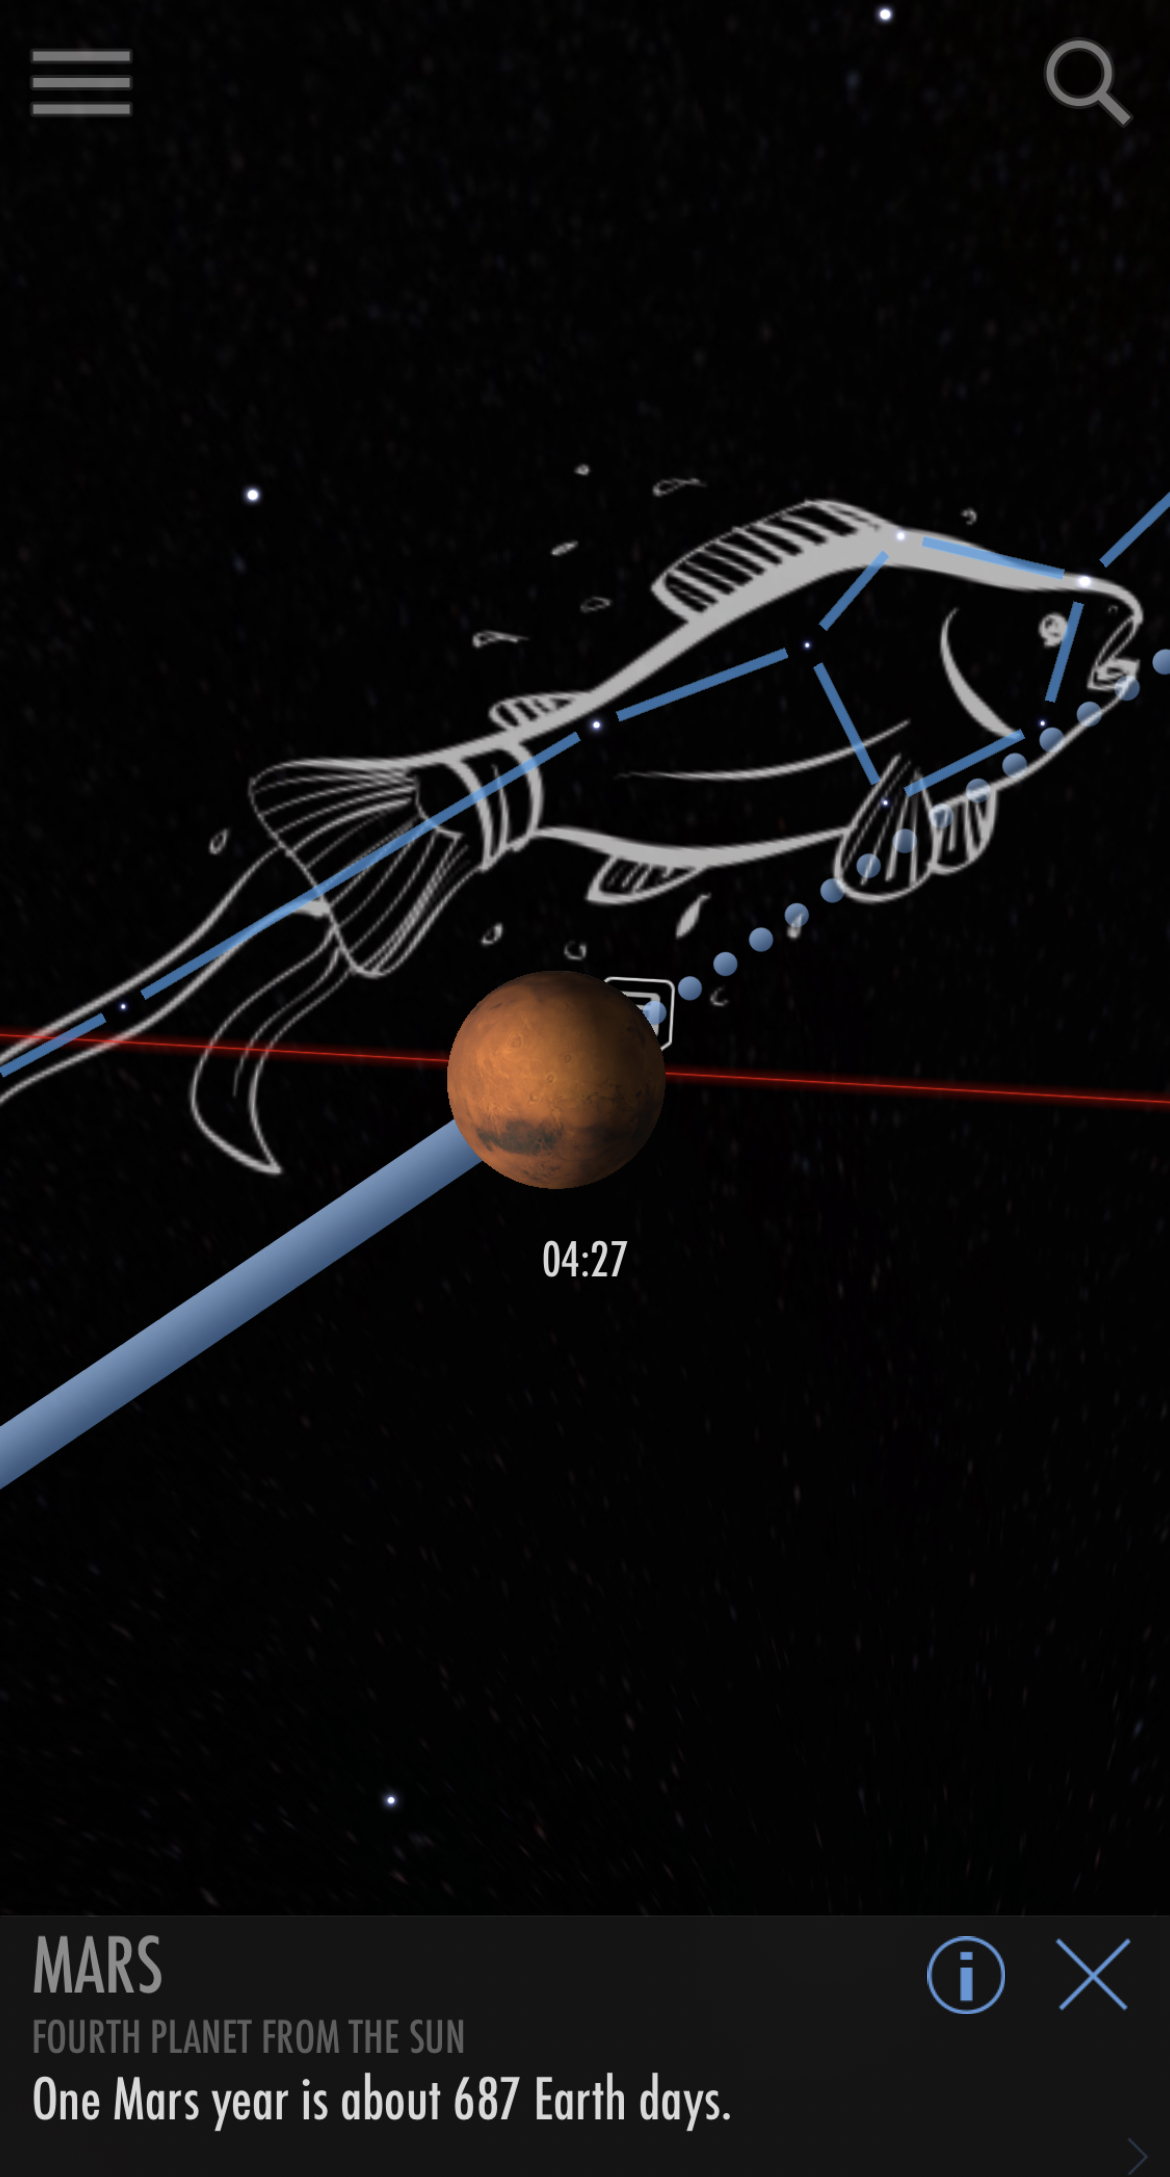
My favourite things about the app are:
- It does not require an internet connection or GPS, so it can be used in remote areas.
- Tap on any celestial object to get a detailed description. Tap again for more information and educational facts.
- The app works indoors, too, so you can learn anytime, regardless of the weather.