Blogpost by Noel Czempik (Student Digital Champion)
Main positives: Free. Customisable settings for different apps. Motivating.
Main negatives: Take a bit of time to set up for each app.
Nowadays, smartphone users often find themselves in a losing battle when it comes to staying focused. Access to distracting apps has become so easy and habit-forming that we get lost in the digital world before we get a chance to make a deliberate choice. This is one of the reasons I decided to try a digital detox in December, and that was when ScreenZen came to the rescue!
What is ScreenZen?
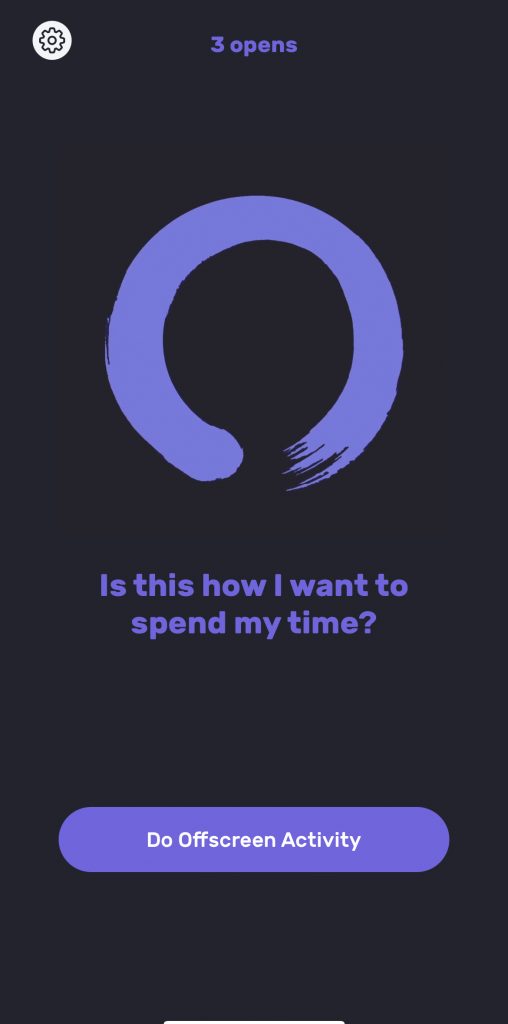
ScreenZen is a configurable app that empowers users to set boundaries with their devices. Unlike traditional app blockers that restrict access entirely, ScreenZen introduces a novel approach by increasing the barrier to entry. By providing users with time and mental space to make conscious decisions about their digital consumption, ScreenZen naturally fosters mindfulness in the interaction with technology and, therefore, better digital wellbeing.
The app is entirely free and available for both Apple and Android users.
What are ScreenZen’s main features?
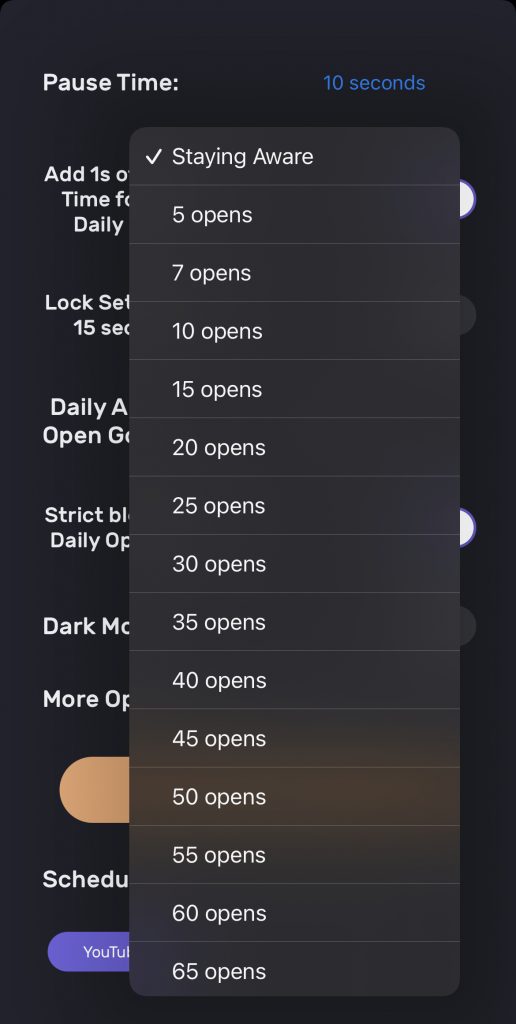
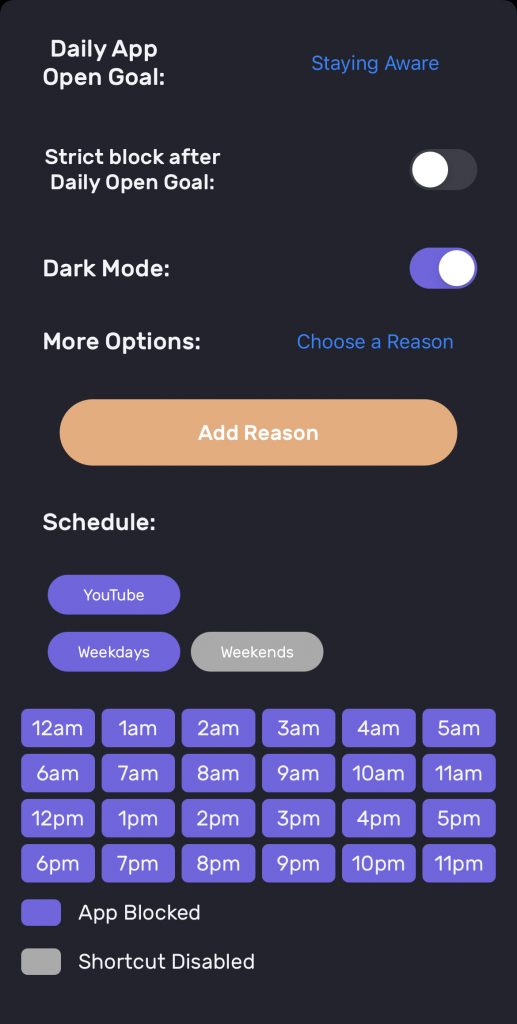
What sets ScreenZen apart is its remarkable customisability, and its main features are:
- Allowing you to choose a specific wait time before you open each app.
- Interrupting you whilst using selected apps after a set time (you can set different times for your various apps).
- Cutting you off when you’ve reached your daily time limit or pick-up limit (i.e. how many times you open an app each day) and even preventing you from changing the settings to get around it.
- Displaying a motivating message or remining you of more valuable activities to you.
- Introducing more mindfulness into your digital habits by prompting you to do breathing activities whilst waiting for the app to unlock, which also encourages you to reevaluate your need to use the app you’re trying to open.
- For the goal motivated, accessing streaks and other stats to track your progress and encourage you to stay on track, but only for the apps you choose, so you can still read ebooks or use your favourite meditation app without worrying about losing your streak!
My final thoughts on ScreenZen
Will I continue to use ScreenZen? Absolutely!
My favourite thing about this app is that it makes it easier to align my digital choices with my values and routines and can be useful to anyone. Whether you prefer strict limits or simply looking to cultivate awareness of your digital habits, ScreenZen accommodates these diverse preferences. The customisability features mean it takes a while to set up, but once set up, I found this app to be a valuable addition to supporting my digital wellbeing.