
Blogpost by Laurie Stevenson (Student Digital Champion)

I published Part 1 of this blogpost earlier this week, where I introduced you to 5 tips and tricks to help you make the most of Excel, and this blogpost contains 5 further tips! If you want to learn more about Excel, please visit my new Excel LinkedIn Learning collection.
Tip 6: Adding in multiple rows or columns at once
If you want to add more than one row or column in one go, this tip will save you the time of having to do this one row at a time.
- Highlight the number of rows or columns you want
- Right-click on the highlighted rows or columns
- Choose Insert from the drop-down menu that appears
Tip 7: Adding bullet points
Finding the button to add these is not as easy as on Microsoft Word but luckily there are a couple of different ways to do this.
Option 1 – If you have a numerical keyboard:
- Select the cell where you want to add your bullet point
- Input ALT+7 into the cell
- Your bullet point should appear (if it doesn’t, try option 2 below)
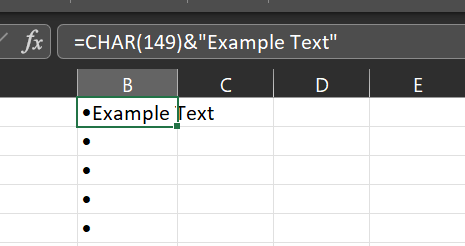
Option 2 – Another option is to:
- Select the cell where you want to add your bullet point
- Input =CHAR(149) into the cell (this will add just the bullet point)
- If you want to add text after the bullet point, input =CHAR(149)&”Insert Text Here”
Tip 8: Hyperlinking to a webpage within your spreadsheet
To link to a webpage within your spreadsheet:
- Click on your chosen cell and under the Insert tab select Link (or you can also right-click on the chosen cell and select Link from there)
- Type or paste in the website URL allowing you to be taken directly to that website when you select the chosen cell
This tip can also be used to take you to a YouTube video by copying the URL of your video on YouTube and pasting in the same way.
Tip 9: Adding tick or check boxes

This tip can be really useful if you are using Excel for project management, organisational purposes or to visually illustrate a positive result in a data set or in response to a question. To add a tick or check box:
- Go to the Developer tab
- Select Insert and choose your desired check or tick icon
Tip 10: COUNTIF function
This function allows you to count the number of cells that meet particular criteria set by you, for example the number of times a particular job appears in a list of people.
- In an empty cell type =COUNTIF( followed by either typing the cell range you want to look in or by selecting and dragging over the desired cells
- Then type in the key phrase, number or character you are searching for in speech marks (don’t worry, this function isn’t case-sensitive so you don’t need to worry about using capital letters or not for word searches) – e.g. =COUNTIF(A3:A25, “Doctor”)
- Close the brackets
- Then press the Enter key