

Wanted to count how many times a name appears in a column alongside other conditions in Excel? With DigiTip 57 we can show you the formula to get this done.
First you will need data similar to that shown in the screenshot where you have multiple columns of information where you want to count how much of a certain criteria exists such as names or dates for example.
To do this we are going to need to use the COUNTIFS function in the formula tab, this is shown in the screenshot below.
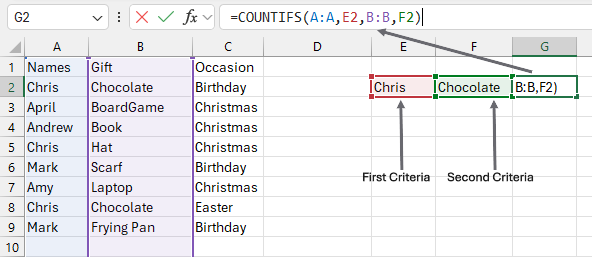
This takes the criteria range which in the example is the column of names and then the criteria itself which in the example would be the name Chris at E2. Also include in the example is another criteria range of the column of gifts and the criteria of Chocolate. This will then go through all the information and count only when these two criteria are met.
This could be useful on a larger scale for tracking any number of things that are happening on a spreadsheet.
To follow our DigiTips, subscribe to our Digital Skills Blog. Or alternatively, you can bookmark this webpage, where a new DigiTip will be added each week!