Arctic Survival Training
First things first, unfortunately, not long after my first blog, my laptop broke. Until now, I have been without, consequently, no blog. However, with my new laptop all set up, without further ado, here is my second blog – Arctic Survival Training.
When coming to UNIS to study, it is vital that we know about the environment we are going to be exploring and living in. This is, after all the Arctic, and the Arctic can be an extremely dangerous and harsh environment, so knowing what situations could arise, and how we deal with those situations is a highly important factor of living here, in addition to only having less than an hour in some cases to save a person’s life, when help is likely to take over an hour to arrive in such an isolated place. Some of the biggest (and scariest) scenarios we could encounter include, Avalanches, Crevasses and Polar bears. Myself, and all the other new students were about to spend the week learning how not to die in the Arctic.
The first day of training was a basic introduction to the environment of our new home, things we could encounter, and how to dress for the weather. Living in the Arctic poses a few problems, firstly the weather; there is no solid weather forecast for Svalbard, as it is extremely unpredictable and can drastically change within 12 hours. Secondly, the distance; Svalbard is an Arctic dessert and so is a very isolated place, when out exploring, you can find yourself very far from basic humanity, sometimes rendering communication. Therefore, before going into the field, one must know how to deal with any situation that could occur. One of the most simple and important things, is to be wearing the correct clothing, and always taking extra clothing. If the correct clothing is not worn, you are putting yourself at high risk to frost bite and hypothermia.
Our second day was when we started to learnt all the important details of Arctic safety. Firstly we learnt about navigation and communication. This involved route planning, use of GPS and a satellite phone. In the afternoon we then went up to the rifle range where we were to learn about polar bear protection. On Svalbard, there are approximately 3,000 polar bears, and 2,000 people, and it is illegal to leave the town without a rifle and flare gun for polar bear protection. Before I go any further, I must stress that the polar bear is a protected species here on Svalbard, and polar bear protection is taken extremely seriously. In most cases, if a polar bear is seen from a distance, we are not endangered, and it is our duty to then leave the area to avoid any confrontations with the bear. However, if confrontations cannot be avoided, a flare gun is firstly used in attempt to scare off the polar bear. This is normally very effective, and the bear will walk away without any trouble. In very rare cases, the polar bear may be unaffected by all attempts to either walk away from the bear, or scare the bear, and the bear could become a threat. It may then be necessary to use a rifle to shoot the bear. Again, I must stress, this is a last resort taken in a life or death situation. At the rifle range, we learnt how to use a Ruger 477 Rifle, and a flare gun. As someone who had never used a proper gun before, this was initially extremely terrifying! It was loud and very very powerful, but somehow I managed to pass the test and so am allowed to rent and handle a rifle in the field!

The morning of our third day was spent learning about emergency camp set up. When going far from the town, an emergency camp kit between 6 people is to be taken. As said earlier, the weather can change here on Svalbard very drastically. If a group were to find themselves stuck in a snow storm, it may be safer to set up an emergency camp to avoid putting the group in any further danger. Additionally, if a member of the group becomes injured or unwell, it may be necessary to set up an emergency camp whilst waiting for help to arrive, again, as said earlier, help can take hours to arrive. We learnt where to set up an emergency camp; away from avalanche risk areas, and crevasse prone areas. The emergency camp kit includes a tent, a stove, a tripwire, sleeping bag, mats, emergency food rations, first aid kits and a hypothermia wrap.
In the afternoon we learnt first aid, and how to apply it to cold weather conditions. Within our first aid course, we learnt patient examination, CPR, recovery position, bleedings, hypothermia, frostbite, fractures, burns, CO poisoning and how to safely remove a snowmobile helmet. When performing first aid to a patient, it is important to make sure the patient is warm, this could involve transferring the patient into the hypothermia wrap, which involves a vapour barrier, an insulation layer, and a windproof barrier.
Day four we learnt about Avalanches. Avalanches are not uncommon in Svalbard, and one must check the avalanche risk before leaving the town to go an explore. We firstly learnt about avalanches, the different types, how to work out if a mountain is avalanche prone, and how to move safely in avalanche prone areas. We then learnt all the different techniques used to search for people who have been caught in an Avalanche. Firstly, one of the best ways to find someone in an avalanche is to use an avalanche beacon. When leaving the town, everyone should have an avalanche beacon, and turn it on. If someone is then to be caught in an avalanche, the beacons can then track other avalanche beacons. Another method is the probing method, in which the group forms a line, and probes the avalanche area. In both cases, one should always be doing a visual search, looking for any clues, such as gloves, skis, etc. If a person is located, it is then time to start digging. And you must dig fast. The chance of survival if a victim is found and dug out within 15 minutes is 92%, this then drops to 37% after 35 minutes, and 15% after 2 hours.
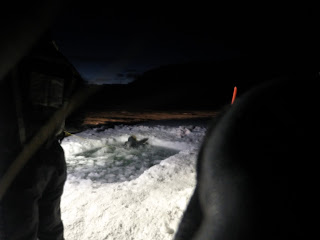
Day five was the day I had been dreading all week. Sea Ice rescue. In many cases, when exploring Svalbard, groups travel over sea ice. Which, when planned correctly, can be very safe to travel across. However, there may be cases when one may fall into the sea ice. In such cold water, you have less than two hours to get out before losing your life to the ice water. We firstly learnt how to determine if sea ice was safe enough to travel over, and how to detect weaknesses in the ice, and look for potential dangers such as seal holes. We then, went to the ice water hole. In which we had to jump in, and practice getting ourselves out using ice spikes. Before entering the water, we put on snowmobile outfits, which one would most likely be wearing if they found themselves in this situation. These outfits are very big, heavy and highly insulated, to keep people warm when riding on snowmobiles in all conditions. They are not however waterproof. As soon as I entered the water, the ice cold water went straight through my suite and hit my body. With each second, the suite got heavier, and my body got stiffer. I swam the 4 meters to the other side of the ice pool, where I was to then locate my ice spikes and proceed to pull myself up out of the water. So much harder then anyone could ever think. The heaviness of the suite, the stiffness of my body and the slippery nature of the surface I was to grip onto to pull myself out made this task extremely challenging. In addition, my body had naturally started to panic in such conditions. After what felt like an eternity, I was finally out, and pretty much just lay flat out like a seal for a fair amount of time before finding the energy to stand myself up and sludge my way back to the truck. (Look out for my facial expression in the video). On getting back to the truck, my body was still extremely stiff, and I had to be lifted into the back where I then discovered I had random chunks of ice attached to various parts of my still freezing cold, soaking wet suite. I also came to the conclusion, I am as good as dead if I end up in the sea ice. Avoid.

After drying off, getting into some clean warm clothes and having a nice hot dinner down me, it was time to learn about glaciers and crevasse rescue. 60% of Svalbard is covered by glaciers, and we will end up travelling across them during our adventures. We learnt about glaciers, the different types, the dangers they may cause us, namely crevasses and melt water channels and how to move safely over crevasses. We then also learnt how to perform a crevasse rescue. This involved many ropes and many different clips and pulleys.
The Saturday was then spent putting everything we learnt to the test, and going out into the field for the day where we were given scenarios in which we had to plan and perform first aid and rescue procedures. The day was then topped off with watching the rescue helicopter circle and “rescue” people, and the aurora decided to come out for us too.
Overall, a very tiring week with a lot of things to take in. But, it was all so much fun, and I am already loving this place. It is a completely different world up here, especially compared to the UK (where I am from), so far though, I am enjoying every second of it, and I am falling in love with Svalbard more and more everyday.
Check out the video>>>>>> https://www.youtube.com/watch?v=9Wv5gqNsoN4
Stay tuned for the next blog!
Jennifer
